Showing posts with label Bigz. Show all posts

Monday, 10 October 2016

A simple start to Christmas!

Nikki Acton Simple Christmas Cards
Hello! I thought I would start making a few Christmas cards using up some scraps of paper lying around. These cards are 4 x 4 inches (10 x 10 cm).

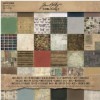
I have used Tim Holtz Ideology paper for these - not sure which packs - as they were scraps on my desk - but probably Crowded Attic. 
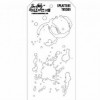
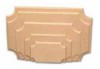
I started with 2 layers - one 7x7cm and the other 7.5x7.5 and then cut my die cuts to coordinate - using Star dies and Christmas packages.
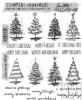
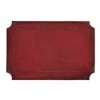
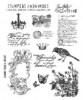
For the card on the left of the photo I added a little Hickory Smoke ink around the edges and stamped Happy Christmas from the Scribbly Trees Christmas stamp set around the edge of the card in Watering Can archival ink.  I stamped the same greeting on the red paper in versamark and embossed with white powder. 
For the second card I kept it simpler - no ink - just layered the card and added an additional matt in gold card. Some twine and rhinestones from my stash finished the cards.
Nikki

Tuesday, 22 September 2015

Fly Away Mail Art

Hello Everyone! Jennie here again with my second post of the month and I hope you will forgive me doing a little repeat of my post earlier this month, but I really have got rather hooked on making these little single layer mail art pages!


I absolutely love this new Tim Holtz Distress Ink - Blueprint Sketch. It is such a fabulous shade and has an amazing vintage feel about it (perhaps because I can remember the old Blueprint Drawings and Printer where I worked in the early 1970s!)


I started this page off again with the foreground element, stamping the bird in Blueprint Sketch and then making a mask from a post-it-note.


Once the mask was in place I could then stamp the underlying elements which I did using Vintage Photo Distress Ink and and stamps from the Correspondence and Shabby French Set. Layering the "stamp" stamp over the vintage photo created a darker hue and I can't wait to combine these two colours ……… 


I then added some further layers using the Splatters Layering Stencil and Vintage Photo and blended more Vintage Photo around the edges of the page. I felt the page needed something in black and so stamped the postage frank mark in Arcival Jet Black.


Finally I added some splatters using my paintbrush and the two inks used for the stamping. Again, although this is destined for my Big Ticket Book I really think this would make a great topper for a masculine card.

Thank you for joining me today and I promise I will be back with something different next month!

Jennie x


Thursday, 10 September 2015

Single Layer Correspondence Art


Hello Everyone! Jennie here with you today with my first project of the month. I decided to do another page for my single layer stamping Big Ticket Die Book using those wonderful Stampers Anonymous Correspondence Stamps.


I am still learning this single layer skill and did work the design out in my head first in order to determine what would be stamped first!


As the main focus was going to be the lovely vintage gent from the Mercantile set I stamped him in Arcival Jet Black and made a mask using a Post It Note. I find this works well for a single project, just make sure you stamp in order to use as much of the "sticky" bit at the top of the note.


Once he was masked I started stamping with Vintage Photo Distress Ink and a little more Arcival Jet Black. Most of the Vintage Photo was second generation stamping - I stamped off onto a piece of paper first in order to get a lighter shade of ink.


I then used the Splatter Layering Stencil to create some old vintage marks and blended more Vintage Photo around the edges.


Finally I spritzed some Vintage Photo Distress Ink over the page using the Spritzing Tool and a Vintage Photo Distress Marker. I have only recently purchased this tool and love the very fine marks it gives which makes a change from the larger marks my paintbrush splatters around the place!

Although this is for my little book I do think this would make a good topper for a masculine card.

Thank you for joining me today.

Jennie x


Thursday, 16 July 2015

Layered Butterfly Panel

I do love glossy accents! Today I have a simple, but hopefully effective wall panel to share with you using Tim Holtz Layered butterfly die and glossy accents. 

I started with an MDF panel and created a wood effect background using Deco Art paints and a little treasure gold. I won't go into detail here as I did a post recently on creating wood effects. The difference today is I added a few streaks of Treasure Gold too - to add a little contrast and sparkle.

I took some heavy card and gave it a layer of gesso before cutting and embossing the butterfly with Tim Holtz's die set. I then took distress paints in Chipped Sapphire, Salty Ocean, Peeled Paint and Stormy sky and roughly painted it. Once dry, I dry brushed (very lightly!) some black acrylic over the surface to highlight the embossed areas - also catching the edges of the butterfly. Once dry I completely covered it with glossy accents and left overnight to dry fully.
I finished my panel with the phrase from Tim Holtz Perspective stamp set and embossed with gold powder and added a touch of treasure gold around the edges.
I did another one at the same time - do hop over to my blog if you would like to see it - it is a little different.

Thanks for stopping by.
Nikki