Showing posts with label Thinlits. Show all posts

Saturday, 20 February 2016

White Fire Wanderings

Hello all, Alison here from Words and Pictures, and I've been playing with the oh-so-fabulous new White Fire Fresco Finish paint from PaperArtsy.


I've loved the White Fire colour of Treasure Gold right from the start of my crafting, and it remains my go-to gilding wax... and now I can have it in paint form - fully metallic with a fabulous sheen.


It's also one of the translucent Frescos so you can use it over colour to add a fabulous sheen, or add several coats for more coverage.


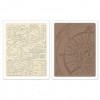
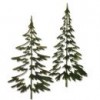
I used two ATC sized pieces of card and ran them through the BigShot with the Tim Holtz Compass embossing folder, and then gave them a rough coat of the White Fire paint.  You can still see the card coming through in places, but even so the shimmer is fabulous.


I spritzed with some of the blue and green Distress Sprays, as well as adding some Ground Espresso.  I let the ink pool and in places spritzed it with water to get it to move more.


I added some more burnishing with Sepia and Jet Black Archival inks, just sweeping them over the raised texture in places.


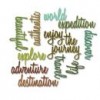
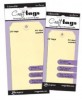
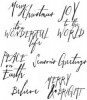
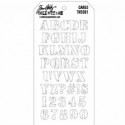
The words were cut in plain white card using the Adventure Words Thinlits.  Once cut, I gave them a coat of the White Gold and then burnished with the Archival inks again.


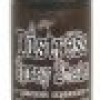
They're layered over some torn book pages, and I added some vintage pen nibs to record the journey!


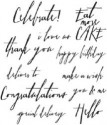
I added a bit of text stamping for extra detail and interest.


That's about it - a simple make, just a way to experiment with the White Gold Fresco paint really... and I can highly recommend it!


There's another project coming your way here in the next few weeks using the same paint, and if I weren't away from my craft table I'd probably still be playing with it now!


Thanks so much for stopping by today, and I'll see you again soon.

Alison x

Click on the links to go shopping at Country View Crafts:


Saturday, 12 December 2015

Sparkling Woodlands Tag - by Alison

Hello all, Alison here with some sparkling fir trees for you.  I don't break out the glitter very often, but if not at Christmas, then when?!  And after a brief skirmish with the bright traditionals, red, gold and green, I'm back in my neutrals comfort zone... in fact pretty much monochromatic.


It's also my first time having a play with Tim Holtz's new Vintage Platinum Glitter Dust... I think it probably won't be the last!


For the background, I swiped Ground Espresso, Pumice Stone and Hickory Smoke inks on to my craft mat and did some wrinkle-free distress technique on to the tag.  It turned out there was more Ground Espresso than the rest, so it all got rather dark rather quickly.  I spattered some Fresco Snowflake over it to lighten things.


Then I thought it would be nice to have some snowfall, so I used the Speckles layering stencil to add some more white paint, and sponged a bit on to the foot of the tag too, to create some snow drifts.  I decided there wasn't quite enough snowfall, so I added a couple of spritzes of DecoArt Media Mister in White Shimmer.


Turns out that was a good idea, as you get a whole lot more shimmer into the bargain!


The trees were cut using the wonderful Woodlands Thinlits, and I painted them with some Ground Espresso Distress Paint so that they would be the right colour under the glitter dust.


I used Sticky Embossing Powder to adhere my Vintage Platinum Glitter Dust, and then rubbed some off again in places so that the trees would have a slightly more distressed "bark" look.  Yeah, right... whoever heard of glittering bark?!


I used a pastel pencil, blended with a water brush, to create some shading under the trees to ground them.


And I stamped the word from the Handwritten Holidays #1 set in Versamark before embossing with dark brown embossing powder.


The whole thing is mounted on some white card, both layers distressed with the Paper Distresser.  And I topped it off with some simple Crinkle Ribbon (slightly grunged with a hint of Ground Espresso) and fine twine.


It was a bit of a nightmare trying to photograph my sparkling trees, hanging the tag in the ivy in strong wind, trying to catch the last rays of the afternoon sun.  But I hope you think it was worth it.


Thanks so much for stopping by today, and I'll see you again soon.

Alison x

Wednesday, 12 August 2015

Bird Crazy .

Well trace here and my turn to share a make today, and I too have succumbed to those crazy birds from the one and only Tim Holtz...but if you know me you will know I do love my neutrals so here is the crazy birds , neutral style x


softer tones...


and for those who like to be a little different...


So here is how I made them ...

Apply some distress stain to craft sheet and spritz with water to create droplets. Swipe card through the colour and then heat dry . Then add to card front and trim to size -  Then place lattice layering stencil and apply distress ink in places , I tend to do two corners on one side and the opposite middle of the other side. I used frayed burlap distress ink.


Ink up script stamp using frayed burlap ( this stamp is script from classics #9) and use unmounted rolling stamp on card to get a part stamped image. repeat across areas of the card.


Now ink same stamp using hickory smoke distress ink and again randomly stamp across card front to build up the layers of interest.


 Now place numbers stencil over the card and apply some hickory smoke distress ink through part of the numbers , I used cut n dry foam but a mini blending tool works great too.


here is completed card front with all those layers ..


Now apply walnut stain distress ink around the edges using blending tool


Now stamp crazy bird of your choice in jet black archival and add colour to your image...I played with some alcohol markers here but distress markers work great too... Then use coordinating framelit dies and cut around your bird...these dies are great as they take away all the hassle of fussy cutting out...and used with magnetic base plate stay perfectly in place!


One cut I added some walnut stain distress ink around the edges .


Here is the bird placed on card front...I moved him in the end...


To complete I stamped happy birthday in jet black archival, added some dyed seam binding and finally stuck on my crazy bird.


I love that these cards are simple and yet so effective to do.....and I love how the birds can rock my much loved neutrals...

My personal favourite is this rather sad looking little one with super pale neutral tones...


And for those who like to be a little different this crazy bird reminded me of a bat ...so he has his adventurous head on and is hanging around upside down...


Hope you like my inky layered makes....and maybe you will have a play with neutral tones or maybe ... play with more colourful tones to create layered cards.

keep those fingers inky !
trace x