Showing posts with label That Special Touch Masks. Show all posts

Tuesday, 20 January 2015

Textured tag 2

Hello it's Brenda here and I am sharing a follow up tag to the one I posted here on Sunday and happens to be the previous post. Whereas the last one was very much more of a feminine theme, this is for those of you who like to have ideas for more masculine tags and cards. Yes although this is a tag, why not use the ideas to make a card?


The background was made by swiping gesso over a size 10 tag, spreading it on like buttering bread. Heat dry.


Drip distress paints or distress stains down the tag so that it covers the background and dribbles through the cavities of the textured areas, misting with water of glimmer mists.


Decide and collext together all the pieces you want to add and I love to layer mine, collage style.


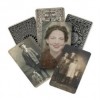
I took one of Tim's found relatives and cut him out but can you see what he is mounted on? Yes I peeled the backing off of the card and then stuck him onto it.


Once the paper layers had been stuck down, I placed the tag under a heavy box to flatten before adding the 3D embellishments.


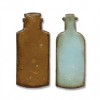
I used the tarnished silver technique for the movers and shapers chipboard bottle and the rusty cog is one I made for a tutorial on A Vintage Journey, you can find out how to make them HERE

.
Pop back again on Thursday when Chris will be sharing another of her fabulous inspirational projects.

Thanks for stopping by.

hugs Brenda xxx


Thursday, 4 September 2014

A nautical theme…

Our sister blog, Country View Challenges, has a fabulous theme this month of N'autical' so I thought I’d make a sea-faring card for you today to demonstrate the beautiful Spellbinders’ Anchor die as well as a few other items…

NauticalBlues09

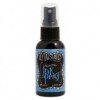
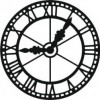
Starting with plain white card cut to the appropriate size, I misted it and sprayed two blue Dylusions inks onto it and moved the card around to blend them. I then used the TST Antique clock mask to water bleach the shape of it:
NauticalBlues01

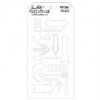
Then came the arrows layering stencil and Picket fence DP before edging with Black soot DI:
NauticalBlues02 NauticalBlues03

Mounted onto white and then black and added to the card blank, this was the picture canvas:
NauticalBlues04 NauticalBlues05

Words were stamped here and there with black archival ink:
NauticalBlues07

I used the same technique to colour another piece of card and then cut out the anchor using this gorgeous Spellbinders die. The anchor was mounted onto a globe from one of Tim's ephemera packs. The card was finished with a bow of black American seam binding with a charm pinned to it:
NauticalBlues06 NauticalBlues08

Top:
NauticalBlues10

Bottom:
NauticalBlues11

Complete:
NauticalBlues13

I find I'm creating more and more backgrounds myself, from scratch. Yes, of course it's lovely to reach for a paper stack and use it but few of us have designs covering every topic we want to craft about. Stencils, masks and stamps are so very versatile lending themselves to so many uses for various topics. When I bought the arrows stencil I had no idea it would end up being used for a nautical theme, lol.

I hope you enjoyed your visit, thanks for stopping by. There'll be another project on Saturday, from Amanda.

Have a great day!  >:o)

Chris xxx


Saturday, 16 August 2014

Monochrome Musical Layout

Monochrome Musical Layout

Hi everyone, Amanda here with another scrapbook page.  This time, I wanted to show a different effect with the musical embossing folder and masks that I used in my July scrapbook page, and to show an extra way of using the masks.  I hope you like it!


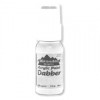
First I stuck the Music border mask to the bottom of a 12"x12" sheet of black Core'dinations card using temporary glue, and dragged a Snow Cap paint dabber over it.


Next, I laid cardstock stickers out along the top of the page for my title and lightly marked the rough area they occupied.  I took the letters away and dragged the Snow Cap paint dabber over where they'd been, to match the effect of the bottom border.  Once dry, I stuck the letters down.


Next I made two sections of keyboard to go behind the middle of the page:  I used the Piano Keys border mask as a cutting template to cut piano keys and borders from black paper and then stuck them to white paper with spray glue.


I stuck the keyboard sections to the base card, using masking tape to line them up.  I mounted my photos onto black card measuring 22.5x19.5cm, matted with white card and stuck in place.  Next I added some journalling in the style of song lyrics: I embossed two lines of music onto white card using a Sizzix embossing folder and coloured the embossing black using a brush marker on its side.  The lines of music overlap a little on the folder, so I cut out each line, cut to length and stuck to white card.


To add the date to my layout I scaled up a note triplet from the Music border mask and cut from white card.


I added the music and note triplet to the page and finished with some journalling written in white gel pen.


Thanks for visiting, and happy crafting!

Amanda