Showing posts with label Bigz. Sizzix. Show all posts

Monday, 20 November 2017

Dear Santa -

Hi it's Brenda back after a break and no this isn't my list for Santa but it is a stand up card created using DecoArt Chalky Finish paints.


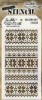
I began by using a brayer and had some fun layering the colours thickly so that I achieved alot of texture. Of course all the colours are opaque so we have to be careful where we brayer the colours as each one blocks out the one below, but by being careful and using less of the colours as we go we can achieve texture and colour. I finished this one with some subtle stippling using a natural sponge and then lightly brayered some white over the top before stamping the background using the chalky finish paint.


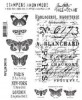
I also stamped the foliage using the chalk paint and olive archival in before distressing the edges and adding a shabby bow and some berries.


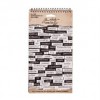
This lovely Santa image is the St Nick die from Tim Holtz. I used the brayer again with the chalky finish paints to create a slightly textured piece for Santa's whitish beard and moustache. I also used some colored texture papers for the other pieces.


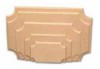
It all came together beautifully and I added a stand made from two pieces of card so he can stand on the mantelpiece with the rest of the Christmas decorations and cards.


I hope all your Christmas preparations are going well and if you'd like to see my other festive makes please pop over to Bumblebees and Butterflies between now and Christmas, I'd love to see you.


hugs Brenda xxx


Tuesday, 8 September 2015

softly falling snowflakes

Well it is Trace here  and this time I have decided to start to create a Christmas project .. I love snowflakes and soft icy blues so they are starting point  for these cards ...


Lots of people like to start making cards early and hopefully this will give you a simple idea for making a batch of cards... they can then be made individual by adding simple touches to make them individual, such as altering layers, glitter or various embellishments.

I started by spritzing some tumbled glass distress spray stain onto a craft sheet, followed by some perfect pearls spray ( you can make your own by adding some perfect pearls powder into a mini mister and adding water..to create the effect of a perfect pearls spray -  you can add a small bead into the mister to help mix up the powder, by shaking before spritzing).


Add the piece of coloured card to the front of the card and trim , then ink around the edges using frayed burlap distress ink.


Using holiday knit stencil , apply frayed burlap using blending tool, in random places.


Now ink up small cluster of snowflakes stamps using white pigment ink and stamp randomly over the surface of the card.

Dye some seam binding using distress ink, tuck inside the card front and tie to form a bow.


Using some of the card that has been coloured cut some snowflakes using layered snowflake, stacked snowflakes and movers and shakers snowflake dies. Edge all these die cut pieces using frayed burlap and have fun layering up onto the card.

Finally add an embellishment to the centre, I chose one of the idea-ology gumdrops and for another a tiny wooden star from stash.

Card 1 :

For this large snowflake , I spritzed the large snowflake with tumbled glass distress spray stain ...and added a gumdrop to the centre of the snowflake..


Here you can really see the sparkle that the perfect pearls adds .


Here you can see the white stamped snowflakes, as they don't show up in some of the other photos..


Card 2 :

For the centre of this I added a small wooden star...


Card 3 :

For this last card I added an embossed panel behind the snowflake....hopefully these three cards show how easy it is to make simple changes to cards to make them seem individual but also based on the same background and same ingredients.


I hope that this trio of cards have inspired you to have a go and have some snowy fun!

keep those fingers inky!
trace x


Friday, 14 August 2015

Live, laugh, love with paper artsy

 Hi everyone, Nikki here (Addicted to Art) to share a decorated MDF plaque with you today.

I took my plaque, some cut and dry foam and paper artsy paints and gently sponged it in a couple of colours. I used iced blue and south pacific here. I start with the lighter colour, add some darker and then a little more lighter depending how the sponged effect is looking. Once dry I took the background stamp from Tim Holtz 'Papillon' and stamp the plaque using ranger white pigment ink.
I then sponged a little black soot distress paint around the edges. 
For my stars I begin with some greyboard and adhere some black and white patterned paper to it - this bit is optional - just white card would do. I cut some stars with the sissix bigz star die and I paint the stars with a translucent colour - South Pacific again here. With the paint being translucent any paper pattern will show through. I add to this with black paint using the edge of a credit card and, once the black is dry, splattering some white paint ( I use a paint brush and just flick it around). No picture here but I also take a black pen to ink up the edges.

I then take my chosen words - usually from the Chit chat or Big chat collections but I have run out of my selected words so did these on the computer. I stick them on and then cover the stars in glossy accents and leave to dry overnight.
Once dry I fix to my plaque and add some string, seam binding or ribbon to hang.


Thanks for stopping by, see you later in the month.
Nikki
xxx