Showing posts with label Texture Fades. Show all posts

Wednesday, 2 August 2017

haunting melodies

Well it has been a while but Trace here with a Tim Holtz filled tag ... my make for today is a Halloween inspired tag using lots of the new Tim holtz goodies.

So here is my make :


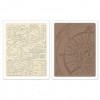
I started by embossing the tag using one of the new folders damask skulls


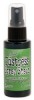
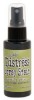
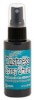
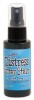
I then added some colour using distress oxides in wilted violet and spiced marmalade, I flicked water over, re-applied colour and then added more water.


the colour highlights the texture brilliantly and shows how wonderful the texture is ..


To highlight the texture some more I applied some distress crayon in black soot and also
 edged the tag with distress soot crayon


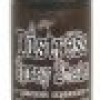
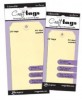
I then die cut the tag using three of the claw marks from the new Tim Holtz Halloween dies and then layered the tag over a black inked tag, I added lots of mini attacher staples and I also splattered some distress paint in black soot.


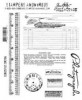
here are the details of the staples..
and sanded away some of the texture


whilst waiting for the new paper dolls I cut out these figures from a found relatives card and sanded so that they took on a more ghostly appearance


I added some film strip pieces


I also added a token at the bottom part - I also added the new die cut cobweb


I completed the top of the tag with dyed seam binding


here is the complete tag :


and here it is with a few twinkly lights :


so that's all for today..

hope to see you soon 

Trace x

Saturday, 20 February 2016

White Fire Wanderings

Hello all, Alison here from Words and Pictures, and I've been playing with the oh-so-fabulous new White Fire Fresco Finish paint from PaperArtsy.


I've loved the White Fire colour of Treasure Gold right from the start of my crafting, and it remains my go-to gilding wax... and now I can have it in paint form - fully metallic with a fabulous sheen.


It's also one of the translucent Frescos so you can use it over colour to add a fabulous sheen, or add several coats for more coverage.


I used two ATC sized pieces of card and ran them through the BigShot with the Tim Holtz Compass embossing folder, and then gave them a rough coat of the White Fire paint.  You can still see the card coming through in places, but even so the shimmer is fabulous.


I spritzed with some of the blue and green Distress Sprays, as well as adding some Ground Espresso.  I let the ink pool and in places spritzed it with water to get it to move more.


I added some more burnishing with Sepia and Jet Black Archival inks, just sweeping them over the raised texture in places.


The words were cut in plain white card using the Adventure Words Thinlits.  Once cut, I gave them a coat of the White Gold and then burnished with the Archival inks again.


They're layered over some torn book pages, and I added some vintage pen nibs to record the journey!


I added a bit of text stamping for extra detail and interest.


That's about it - a simple make, just a way to experiment with the White Gold Fresco paint really... and I can highly recommend it!


There's another project coming your way here in the next few weeks using the same paint, and if I weren't away from my craft table I'd probably still be playing with it now!


Thanks so much for stopping by today, and I'll see you again soon.

Alison x

Click on the links to go shopping at Country View Crafts:


Friday, 6 November 2015

Present Tag

Hello! It's my turn to share a project with you today. My thoughts are starting to turn towards Christmas and I'm experimenting with the tags I'll add to my Christmas presents. I thought I'd share this one with you! 
Start by covering a small tag with old book paper:
Then I inked the inside of a Texture fade with Distress Ink (I've since found out that this one has been discontinued but this one would be a great alternative) and emboss the tag - the ink forms on the tag!
Then I added brown Distress Ink and addd a layer of clear embossing powder
For the decoration I cut a parcel and inked with the same inks as above. For the ticket I inked a stamp with Dylusions Inks in water pens - I like the effect these inks create when stamped.
To give the stamped image a little more interest I crumpled it up.
So, if the one comes my final choice, just about 29 more to go! Thank you, as always, for popping by!