Hello! I was recently very honoured to be asked to be a wingman for Emma Godfrey and her new stamp release. That meant I was given the chance to play with her new stamps and create some samples! It didn't really take much thinking about as I jumped at the opportunity!
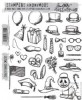
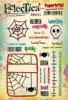
This is the stamp set I'm using today:
It is the first of the three new stamp sets and has some beautiful flowers and for some reason my brain turned them into animals (a bird and a fish!) which you can see
here. I also reimagined them as a sheep and in the course of making the sheep I could see a bee and so I thought I'd share how to turn a flower into a sheep! I love that stamp sets don't have to be just as the designer imagined - that you can cut up sentiments to make new ones or, in this case, turn a flower head into something quite different. You feel like you're getting more for your money then don't you?!
To start, stamp out the large flower three times on to white card (I normally use cream card but you'll need white for this project!):
Then carefully cut out the centre and ink it with black ink:
Then, using the 'petals' from the flower, add rows to the black circle. Leave one quarter clear:
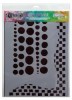
Cut out an ATC and then ink it with blue ink. I added a stencilled grass border. The legs for the sheep were the dot and dash stamp from the stamp set:
The bee was made the same way using the smaller flower as my base. The bee and flower were coloured with Distress Markers. The bee is coloured with Wild Honey and Black Soot Distress markers and the wings were two of the large flower petals, cut out and adhered at angles to each other - they have Glossy Accents on them for a little shine but I'm not sure the picture shows this! To add the sentiment I masked off a larger sentiment from the set, inked the stamp and then peeled off the tape before stamping:
Thank you, as always, for popping by - what other animals can you see from these stamps - I'd love to see them!