Showing posts with label Bird Crazy. Show all posts

Tuesday, 28 February 2017

Easter tag with Tim Holtz crazy bird

Hello Everybody,
It's Monika here with my second post.
This time I have brought you an Easter tag.
This:


And here is my step by step tutorial.

1. I cut out a bigger tag with Sizzix Framelits Tag die by Paula Pacual (658611) from kraft paper.

2. I stamped Tim Holtz background stamp on white cardstock with using Misti Stamping Tool.


3. I covered the stamped image with Ranger Clear embossing powder.


4. I put back the excess to the jar.

5. I heated the embossing powder on the stamped image.


6. I made it twice.

7. I cut out two one size smaller tags from my stamped cardstocks.

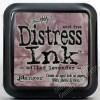
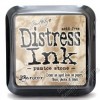
8. I inked the edges with Ranger Distress Gathered Twigs and glued the smaller tags on the big one (both sides).

9. I inked with green Distress inks a white watercolour paper and cut out the greens.

10. I placed and glued them on the tag.


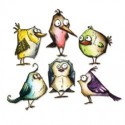
11. I stamped the crazy bird and the bunny ears onto a watercolour paper with black Ranger Arcival ink.

12. I coloured them with watercolour technique using Ranger Distress markers.

13. I prepared many layered flowers a few months ago but I didn't use them, so I could just take three form my stash.

14. I placed and glued all the elements on the tag.


Supply list:

Sizzix Framelits Die, Tags by Paula Pascual (658611)


Stampers Anonymous, Bird Crazy by Tim Holtz (CMS212)


Ranger embossing powder, clear


Ranger Distress markers (Spun Sugar, Worn Lipstick, Squeezed Lemonade)


I hope you like it! Happy crafting!

Wednesday, 16 September 2015

Crazy Bird to celebrate a 21st

Bird Crazy Birthday Card Addicted to Art
Nikki here today to run through a card I made with the popular Bird Crazy stamp set. The card was created for a friend to give to a special person in her life. The request was to use purples, pinks and greys - so here we go....

I started with my purple layer - on the reverse I marked out the areas I was going to cut out to make the frame for the card. I used a little bit of wrinkle free distress in milled lavender and pumice stone and then added dusty concord with cut and dry foam. I then turned it over and cut along my pre marked lines.
Once cut I edged all the white bits with the same ink. Next I took the birthday letters from Tim Holtz (Sizzix) alphanumeric thinlits set and placed on my magnetic platform across the band. As I was using the negative space I kept the all the bits (eg the inside of the 'D' to use later).
Next for my bird! I stamped him in black archival on a second piece of card and then stamped him again in stazon on a mask sheet. Having cut out the mask I carefully placed it over the bird and then used distress paints in pumice stone, black soot and picket fence to create a marbled background. Once dry I removed the mask - and painted the bird with the purple tones.
Finally I took a die cut star, some pre cut numbers in greyboard and a scrap of card.  I randomly stamped in black archival before adding some pink translucent paint. Once dry I added extra interest with some black soot paint with a credit card and then some white spatters of gesso. I die cut 'Happy' from Tim Holtz handwritten celebrations thinlits. 
I cut the little hat by hand out of the scraps from the top layer and added glossy accents to the star.


I hope you like my little card - see you next time!
Nikki
Bird Crazy Birthday Card Addicted to Art


Wednesday, 12 August 2015

Bird Crazy .

Well trace here and my turn to share a make today, and I too have succumbed to those crazy birds from the one and only Tim Holtz...but if you know me you will know I do love my neutrals so here is the crazy birds , neutral style x


softer tones...


and for those who like to be a little different...


So here is how I made them ...

Apply some distress stain to craft sheet and spritz with water to create droplets. Swipe card through the colour and then heat dry . Then add to card front and trim to size -  Then place lattice layering stencil and apply distress ink in places , I tend to do two corners on one side and the opposite middle of the other side. I used frayed burlap distress ink.


Ink up script stamp using frayed burlap ( this stamp is script from classics #9) and use unmounted rolling stamp on card to get a part stamped image. repeat across areas of the card.


Now ink same stamp using hickory smoke distress ink and again randomly stamp across card front to build up the layers of interest.


 Now place numbers stencil over the card and apply some hickory smoke distress ink through part of the numbers , I used cut n dry foam but a mini blending tool works great too.


here is completed card front with all those layers ..


Now apply walnut stain distress ink around the edges using blending tool


Now stamp crazy bird of your choice in jet black archival and add colour to your image...I played with some alcohol markers here but distress markers work great too... Then use coordinating framelit dies and cut around your bird...these dies are great as they take away all the hassle of fussy cutting out...and used with magnetic base plate stay perfectly in place!


One cut I added some walnut stain distress ink around the edges .


Here is the bird placed on card front...I moved him in the end...


To complete I stamped happy birthday in jet black archival, added some dyed seam binding and finally stuck on my crazy bird.


I love that these cards are simple and yet so effective to do.....and I love how the birds can rock my much loved neutrals...

My personal favourite is this rather sad looking little one with super pale neutral tones...


And for those who like to be a little different this crazy bird reminded me of a bat ...so he has his adventurous head on and is hanging around upside down...


Hope you like my inky layered makes....and maybe you will have a play with neutral tones or maybe ... play with more colourful tones to create layered cards.

keep those fingers inky !
trace x