Showing posts with label tags. Show all posts

Friday, 4 August 2017

Mixing the old with the new

Hello it's Jane from Jane's Journal here today sharing some of my newest Tim Holtz buys. I am super excited that in September I will be attending his workshop and will be  playing more with his Distress oxides but for my post today I wanted to share a vintage tag I made using his Distress Oxides and the fab paper dolls , mixing them with some of my older products in my stash, particularly Tim's layering stencils .


If you would like to see the inspiration for my tag today I have linked my own blog post up here sharing a day in London seeing the "old" and the "new" in my favourite city in the world. You will see lots of photos of a sunny day out. I make "Moments" for my physical Jane's Journal to remember special occasions in my life. Sometimes I make art journal moments, sometimes I make tags. It was our wedding anniversary and we celebrated over lunch in the Fenchurch restaurant of the Walkie Talkie building. For this "Moment" I decided to make a tag.

I have provided links to the shop in my post and if any of the products I am sharing are out of stock do fill in the email request and Susan will email you as soon as they are back in stock.
I took a size 8 tag (I cut my own with the Framelits set here ) and made a background using the wrinkle free technique and 3 oxides; fired brick spiced marmalade and broken china and as these were the predominant colours I saw on our sunny day out. I kept the blue at the top to represent the blue sky we looked out to from our table.


I stencilled in some sunny rays using the rays stencil and fossalized amber oxide to represent the sunshine streaming in that day.


I used some of Tim's older stamps to stamp a random love letter background using sepia archival ink.  This is to celebrate our anniversary and 36 years of love and fun...yes I married my soul mate and I know I am very lucky.

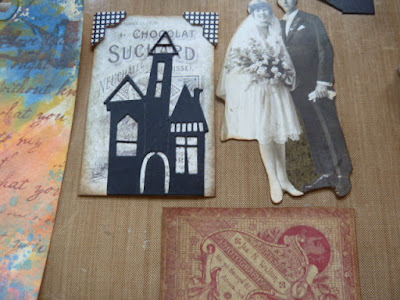
 I also wanted to use one of the great paper dolls. As I looked through the pack I found a vintage bride and groom and I thought it was perfect for my old and new tag

I  die cut an old Sizzix house, bought from the year round CVC sale page (you can find lots of bargains here all year, there are lots of Tim products there too)  a while back and snipped off the bits I didn't need and used some snippets of paper from my stash and a piece of tissue tape to anchor everything together as a mini collage.

I also used the mini heart stencil from set 6 and added some more fired brick oxide to leave "lots of love" on the brides dress and at points on the tag.

 I also added some remnant rubs from the life quotes  set. I thought this saying was perfect.

I finished off with some words from the Ideaology small talk pad and a little red heart from my stash.

Here is my finished tag.
and a few close ups. I love using the Oxides through stencils, they layer up perfectly. 


I really am enjoying playing with the oxides and mixing the old with the new.

A little heads up...Susan is expecting the new colours of Distress Oxides in very soon...I have some on pre-order and cannot wait to play with those too.  Remember that for the UK your orders are also  posted free. These inks really are a game changer in my books, I love crafting with them.

Thanks for stopping by,

Bye for now,

Jane x

Tuesday, 10 January 2017

Single Layers

Hello Everyone! 


Today I am sharing a Tag with you using single layers of stamping and which I then made into a card.
I had taken photographs of each layer of stamping, but I am afraid the photographs were not great. The light is such at the moment here in the north that I feel as though I am living in a sepia photograph!  So I am afraid this is a step by step using the finished card.


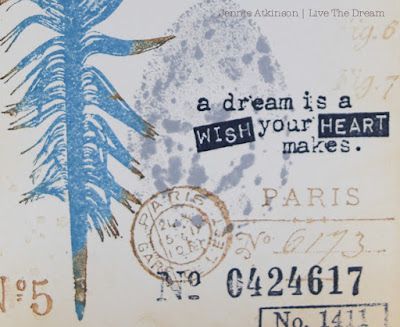
I stamped my main feature (the feather) in Faded Jeans and Vintage Photo Distress Ink and then the egg behind using Hickory Smoke.


Stamping top and bottom in Vintage Photo. Don't worry about stamp marks as they can easily be covered at a later stage. For a bit of contrast I then stamped  in Archival Jet Black using some small stamps from Tim Holtz's Correspondence Set. 


Finally I added another longer stamp in Vintage Photo down the right hand side and blended Vintage Photo Distress Ink around the edges and some ink splatters.


To create my tag card I folded some kraft paper and aligned it in the die so that the left hand side edge was inside the cutting line.  It means the tag overhangs slightly on one side of the card, but it makes for an unusual card.


Thank you for joining me today and I hope this gives you some ideas for some single layer stamping.

Jennie x


SaveSave

Wednesday, 8 June 2016

Distress Crayon Love

Hello Everyone! Jennie here with you today sharing a recent experimental piece with those wonderful Distress Crayons.


I had to have a bit of a stern talk to myself to order the coloured ones (you know me, she who loves anything brown!) but I am so glad I did. Whilst experimenting I took photographs to remember what I had done - so I am afraid this is rather photograph heavy, but I thought you might appreciate the different ways I have used the Crayons in this piece.  


I started by running my tag through the Big Shot with one of my favourite Texture Fades. However, any Embossing Folder would do for this technique, although I think it works better with a little open space here and there.


I decided to then coat the tag with Gesso to see how this would affect the Crayons.


I then wiped the crayons over the tag and then smudged the colours together - I used Picked Raspberry, Mermaid Lagoon and Peacock Feathers.


I really wanted something a little more subtle so I spritzed with water and mopped up a little bit here and there before drying with the heat tool.


Then I wondered what it might look like with some embossing powder over it, so I swiped the Versamark Pad over the raised area and then covered it with clear embossing powder. Well it went everywhere but thankfully doesn't really show up ! although it does glint a bit.


I then blended some Vintage Photo Distress Ink around the edges.


I decided to try the Crayons on the Tattered Florals Die just lightly around the edge and then blending it with my finger before spritzing with water and screwing it up. I made a Rose with these three petals (tutorial here on my blog if you are new to these).


I then started looking around to see what else I could use! This was a die cut finding from ordinary board. I gave it a coat of gesso first and then blended Mermaid Lagoon and Walnut Stain Distress Crayons over it. It seemed a little dark so I spritzed it with water and dried it with the heat gun before giving it a coat of clear embossing powder. It actually looks very effective.


I had cut the bottom of my tag to fit the embossing folder, but felt it was a bit stunted. So I embossed the piece I cut off and using similar techniques made this piece to go on the bottom of the tag. The piece of lace hides the join.


I really love the effect of the crayons on the Tattered Florals.


And as I had used the same colours for all my individual pieces, everything matches.

Well done if you are still with me! 

I do hope this will give you some ideas for the Distress Crayons and that you will enjoy them as much as I have done.

Thank you for joining me today.

Jennie x


Sunday, 31 January 2016

Flutter By, Butterflies - by Alison

Hello all.  It's Alison here again, this time with a pair of tags using some of the fabulous PaperArtsy Hot Picks stamps.


I love these collage stamps - with great images combined with text.  You can use all or part of the stamp which makes them very versatile.


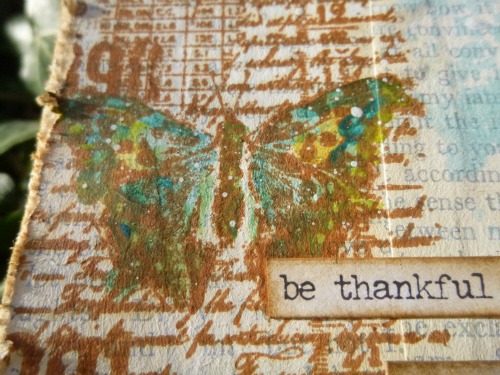
I started by gluing some book page scraps to my tags, and using tape to lift some of the text away, distressing the look of it.  Then I gesso'd lightly and stamped my butterflies in Archival ink.


I love using the PaperArtsy translucent Fresco paints in watery washes to build up layers of colour.


You won't be surprised to see my colour choices - all those lovely blues and greens!


You'll find the colours I've used in the ingredients list at the end of the post.


I use a water brush, as well as spritzing water on to my craft mat next to the blobs of paint...


... and then I just layer and dab to my heart's content.  I also used a watery wash of the Glass Blue to create a blue sky for the butterflies to flutter in.


A couple of Idea-ology metal pieces remind the butterflies of the limited time they have to to spend here...


... and help them choose in which direction to go.


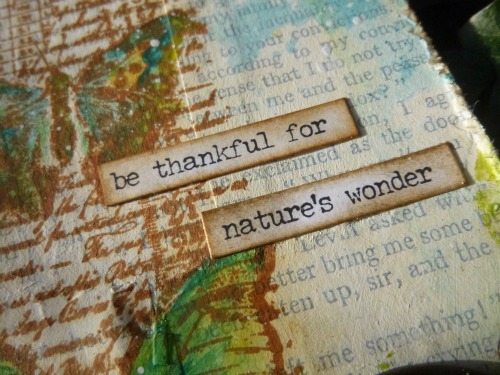
The wonderful Small Talk stickers provide the words...


They're more for us than for the butterflies!


Some simple twine finishes them off.  I hope you like them, and I hope you're enjoying a lovely weekend.

Alison x
Words and Pictures