Showing posts with label Sizzix dies. Show all posts

Monday, 21 January 2019

Sweet Cottontail mixed media card

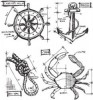
Hi it's Brenda and I'm with you today to share a card with some of the new Tim Holtz products coming out for Creativation. The dies are sizzix chapter 1, the first release for 2019, there will be three more to come over the year

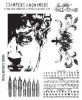
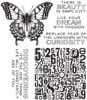
I loved this cottontail as soon as I saw him and will be using him for a workshop coming up soon.


Process steps
Dip and dry the die-cut cottontail in a watery wash of burnt umber and dry.
Repeat with burnt sienna, then raw sienna finishing with raw umber.
Darken the edges with ground espresso distress ink.
Cut another cottontail and paint him black and copper.
I just love the shape of this cottontail and there's a bow to go with him too.


Take a piece of worn wallpaper and give it a watery wash of white gesso and dry. Repeat if necessary.
Stencil with a mix of cerulean blue mixed with titanium white and another stencil with  sap green and titanium white.


Brayer a couple of layers of titan buff over the whole background ....


and then dip and dry in the light blue, light green washes with a tiny drop of raw umber in them to vintage them. When dry splatter with some titanium white and  burnt sienna finishing with a tiny amount of monoprinting with watercolour paper using titanium white and titan buff mixed together.


Cut some of the lovely new Tim Wildflowers Stems from media paper and paint/watercolour using fluid acrylics and a water spray.


Make a greetings embellishment and dye some cheesecloth using watery raw umber and titan buff.


Assemble the card.
The Beauty is in the Details

Once I had put the main pieces together I then played with some flat backed glass domes and a mirror star. With some white gesso, raw umber paint. metallic lustres and mate medium I altered them to look like these.


I also used Tim's new 'bone' mixed media powder to die. cut the bow. I sanded the edges and blended in ground espresso distress ink.


Yep I'm really happy with that now.


Thanks for popping by, I hope you like this fun card and if you have a go at using my process steps please leave a comment below with a link back to your post.

Have a great week.
hugs Brenda xxx


Supplies
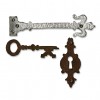
Dies - Sizzix Bigz - Tim Holtz - Cottontail. Sizzix Thinlets - Tim Holtz -  Wildflower Stems #1, Sizzix Thinlets - Tim Holtz -  Garden Greens
DecoArt Media Acrylic paint - burnt umber, burnt sienna, raw sienna, raw umber, cerulean blue, sap green, titanium white, titan buff, carbon black, pyrrole red
DecoArt Media Mediums - white gesso
DecoArt Dazzling Metallics - copper
DecoArt Metallic Lustres - white frost, cosmic blue and iced espresso.
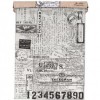
Tim Holtz Worn Wallpaper
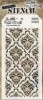
Stencils Tim Holtz
Mixed Media Powder - Bone - Tim Holtz
Flat backed glass domes and mirrored star

Tuesday, 16 May 2017

Wine gift tag using Tim's Framelits tag collection

Hello, its Jane here and I am popping in to share a really quick, simple thank you wine bottle gift tag I made for a friend. 
I recently bought the Tim Holtz Framelits tag collection from the shop. I have had my eye on it for ages and took the plunge. This is the opened pack, you get lots of sizes for your money and a great bookplate die too.

 I make lots of large inky backgrounds and often have pieces left over which I thought I could make into tag bases.
Here is one such piece, just mopping up after using the amazing Distress Oxides.

I used the largest die to cut my tag...it's the size of a normal #8 tag


I used a scallop circle to cut the opening for the bottle neck.


I then used my mini Tim heart stencil, I love these smaller versions.


I added hearts using broken china and worn lipstick oxides. I also added some vintage photo to the edges.


I used another of the dies in the set to cut a book plate label. I stamped and embossed "thank you" in blue and added 2 shiny brads.

And here is my finished wine gift tag...simples πŸ˜‰

The recipient loved it ...and the wine too πŸ˜‹It was a thank you to my friend for looking after our cat when our grandson was born 3 weeks ago. If you like baby photos there are lots over on my blog here today
This is really quick and easy way to make a thank you card and pressie all in one go...nothing to wrap up either...win win in my books.

Thanks for stopping by,

Back soon,

Bye for now,

Jane aka Jane's Journal

Wednesday, 20 July 2016

Voyage

Hello Everyone, Jennie here today, and thank you for joining me for my second post this month.


My husband has his birthday while we are sailing our yacht around the West Coast of Scotland so I decided to make sea faring card for him using as many of my nautical stamps and dies!


I started with Faded Jeans Distress Ink and my favourite Harlequinn layering stencil to add some colour to the base card.


Then added some stamping.


Vintage Photo Distress Ink was blended around the edges and I decided to add the pens to create a dominant feature in the bottom left hand corner.


I cut my globe die in white cardstock and then (carefully!) added Vintage Photo Distress Ink and spritzed it to give a vintage look before overstamping with a text stamp in the same ink.


The blueprint anchor always cuts out very well. After blending Vintage Photo  around the edges and spritzing with some water I used clear embossing powder to give it a bit of a shine!


All my elements were then layered onto the inked and stamped base card and the two quotes added.


A suitable nautical card for my husband!

Thank you for joining me today.

Jennie x


Tuesday, 18 August 2015

Stampers Anonymous Stamp Storage

Hello Everyone, Jennie here, and today I am sharing my second project of the month. 

Back in February 2014 I made some book covers for the storage of my Tim Holtz Stampers Anonymous stamps and they have been so successful I thought I would make another set to house my ever expanding collection! 


I have used some of the new Distress Ink Spray Stain colours (Cracked Pistachio and Mermaid Lagoon) and the fabulous Perspective Stamps.


I started with some heavy greyboard and applied some texture paste through the Gothic and Typo Layering Stencils. I then added various die cuts, tissue tape and tissue wrap to create a small collage along with some mesh and when it had all stuck down well I gave it all a coat of gesso


Once the Gesso had dried it was then time for the fun part! I sprayed colours onto the boards but also plenty of water and kept mopping up with a kitchen towel in order to get more muted tones. I used the following Distress Spray Stains:

Cracked Pistachio
Wild Honey
Mermaid Lagoon
Vitnage Photo


I wanted to add some stamping but there was far too much texture on the boards so I stamped butterflies and some quotes onto tissue paper with Arcival Black Ink. Once these were added I had to try and get the two boards to look reasonably alike in tone so I used a little Black Soot Distress Ink around the edges to tone everything down, along with some Black Soot and Picket Fence Splatters.


As a final touch I die cut the brackets from the Hardware Findings die from what was left of the grey board, but coloured and texturised (is that a word ???) them with Black Soot Distress Paint and Antiquities Frosted Crystal Powder.


And here is the finished book which houses seven stamp sets with these 2" book rings. However, I still had some stamp sets left over (hmmmm …….. ) so I made another set of covers in exactly the same way but this time using Mermaid Lagoon and Vintage Photo.


I am very pleased to say that my stamp storage is now very well organised and I even have room for a couple of more stamp sets ……….. let's go shopping!

Thank you for joining me today. 

Jennie