Showing posts with label Gesso. Show all posts

Monday, 11 March 2019

Vintage journal pages and new Alison Bomber stamps

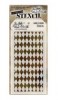
Hi it's Brenda here today and I'm sharing some vintage journal pages created so that I could specifically use the fabulous new stamps from Alison Bomber. I love using quotes on journal pages and Alison has quite a few sets of different themes - the ones I chose are the new 'Friendship' set - EAB10 from PaperArtsy.


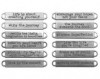
The quotes are varied and beautiful. These were stamped onto media paper and chopped up; I inked the edges with ground espresso distress ink before adhering them to the page.


I started with a layer of white gesso covering the page before adding some collage papers. I then added scrapes of black gesso and more white gesso.


Some subtle stamping creates a little more interest as does some small die-cuts and a couple of tickets.


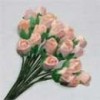
I finished off with the paper dolls with some cheesecloth and of course the important words that give the pages meaning and a story.


There are some more photos of the process steps over at Bumblebees and Butterflies if you'd like to have a go at something similar.

I'll be back next week to show you photos and the project from my workshop last Saturday held at the Country View headquarters.

Happy crafting.

hugs Brenda xxx

Tuesday, 17 July 2018

Wallpaper and dress forms

I thought I would make an easel card using the Tim Holtz wall paper and his inventor 3 set of stamps with the lovely dress forms. You could use the composition and ideas to make an ordinary card but I have gone with the faux encaustic again.


Cut some thin greyboard and adhere a piece of the wall paper onto it using decoupage and then seal it with the same product. You will see that decoupage is very versatile and can be used as a glue, a sealer between layers and as a finish (top layer like a varnish). Scrape a thin and random layer of decoart crackle paint over and leave to dry.


I stamped the dress forms using black archival and then took greyish blue and neutral grey Amsterdam inks to paint n some of the dress form bodies and frames.


I distressed the edges of the panel with a distressing tool and blended in ground espresso distress ink knowing it was likely to move and seep a bit with the layer of DecoArt clear modeling paste on top. 


I stamped the scissors onto matte silver card, cut them out and again blended the brown DI around them and then laid them into the top of the paste just very gently pushing them into it.


The next layer I painted the scissors with a little raw umber and yellow oxide to tarnish them a bit, added some words and the gave another coat of clear modeling paste and added half a snap fastener as an inclusion.


I coloured up a canvas board using cerulean blue, light grey, titan buff and titanium white with a wet wipe to blend the colours. I gessoed using a brayer to create some highlights and then gave it a 'dirty' wash using burnt umber, raw umber, cerulean blue and titan budd with some decou-page sealer and water. I'll have a mini tutorial in my next post at the end of the month to see this with photo steps, so keep an eye out for it.


Eh voila, I just needed to add a mount board easel and it's finished.


I love making these easel cards, they don't take much longer than making a card one but they certainly have more impact especially if you can hand it to a friend but even paying the extra postage is worth it for a special occasion.


 Thanks for stopping by, see you at the end of the month.

hugs Brenda xxx

www.bumblebeesandbutterflies


Monday, 23 April 2018

Attitude Tag - Spring is Sprung

I know these aren't Spring colours but it's just how it evolved as I was making it.


Cover a tag with old book paper.


Scrape some black and white gesso randomly over the surface using the flat side of a palette knife creating some lovely flat textures.


Stitch on some vintage book/music paper or some of your favourite patterned papers. Leave the threads hanging (it's all the rage).


Take a stencil with a small pattern and with a black pen trace the shapes and colour them in. I used one of the Artistic Flair tab stencils and a black sharpie pen.


Cut some of Tim's Wildflowers from white/cream card and blend the edges with ground espresso distress ink and black archival ink. 


Adhere them to the background and finish with a word from the big chat stickers and blended ground espresso round the edges.


I managed to keep some of the book words showing that are perfect for this time of the year.


I think we have all got a bit of this ......


Thanks for coming over to see what I am sharing today if you click on the products in the text they will transport you over to the shop so you can see them and the amazing prices Susan has.

hugs Brenda


Wednesday, 21 March 2018

Find the beauty ......

I have a little journal panel to share with you today made entirely with DecoArt paints and mediums and some of the brand new Aall & Create stamps.


The background was made by laying down some gesso applied on the back of a palette knife and left to dry before adding in some colours - primary cyan, cerulean blue, titan buff, raw umber and burnt umber, taking time to add some dips of watery washes of these colours and finishing with a brayer and titanium white to bring some brightness back. 


The stamp set has 11 stamps in it, so there's plenty to help make up a composition with the brush which has written around it -
Art washes away from the soul the dust of everyday life.
The stamp above says - Creativity takes courage.


The little arrow and dots make a nice fill in piece and the circles make up a great border.


I love using text so I added some very light random stampings of one of my own small stamps.


I used the quotestamp on paper so that it stood out more and shaded round it after I had finished and sealed it all with matte medium.


To get the finished look I splattered some raw umber and white paint and dried it and took my white posca pen to add some small dots in the circles and a black one to add some squiggly border additions. I sanded the edges and blended in ground espresso distress ink.


Thanks for stopping by.

hugs Brenda xxx


Wednesday, 6 April 2016

A Simple Thought

Hello all, Alison here from Words and Pictures with a simple card for you today.  I don't often create cards but, when I do, it seems that simplicity is often where I head for.


This was created with a piece of kraft card which I'd used to mop up leftover white gesso.  It then sat around for ages until one day when I had the Sara Naumann bird stamp set out and the two things just called to one another.


I kept it very simple with some Ground Espresso Distress stamping, clear embossed for extra impact, and then added a few extra twigs to balance the composition.


And what could I possibly use as a sentiment for such a simple card other than one of the Tim Holtz Simple Sayings?!


I layered up the kraft over some plain white card.  And on the inside, I created a complementary panel for sharing your thoughts with whoever you are sending it to.


I hope you like it (and the nice short post, for once!), and I'll see you again later in the month.

Alison x

Thursday, 18 February 2016

Shabby birthday hanging

I have a couple of friends birthdays coming up so I thought I would make a different and more special 'card' for their happy day. I don't know about you but I put a lot of effort into making friends cards so why not make one that they can actually keep rather than throw or put sway after the big day. This was to be a wall hanging card which at the end changed my mind and I will add Tim's mini easel on the back so that will definitely mean they can keep it out on their shelf for longer.


I started with a 5 x 7 inch canvas board and layered it with gesso using a brush, palette knife and plastic card to add texture and coverage.


When dry I added some text texture using Tim's typo stencil and DecoArt modeling paste and when that was dry I used his harlequin stencil and some glassy gel from my supplies.

I felt a shabby colour palette would be popular with one of my friends so chose titanium white, titan buff, green gold, hansa yellow, sap green, prussian blue and quinacridone red media fluid acrylics (see shop list below) and the white shimmer mister to mix up the soft palette I wanted. Mixing the greens, cream, white and blue I created watery colours and let them drip and misted them with water to get the mottled effects.


The board then went through a whole process of me experimenting with layers until I was finally happy with the results .... adding more drips of paint and drying them ....


.... adding text stamping using olive archival ink ....


 .... spritzing white paint with the shimmer mister and drying it ......


.... adding some brown distress inks to create shadows round the letters .....


.... spritzing the distress ink to create more drippage ....


.... taking out some of the brown and adding in more of the green because I thought it took away from the shabby feel I was trying to create ....


... and then spritzing with the white mister again and using a piece of cut and dry with white gesso and rubbing over the raised letters to bring them up whiter.


Now feeling happy with the background I set about collecting the embellishments. Paper flowers, a wooden frame, a metal wing, a metal butterfly all painted with gesso. A word band painted with bundled sage distress paint and before it was completely dry I wiped across the surface leaving the lettering slightly green. Lace, leaves, cheesecloth and other little bits (and more came later).


Some close ups of the finished piece - a wordband with some lace and tiny flowers ......


... a shabby bow and a prima mini watch with one of Tim's photos in it (it must have come from one of the 6 x 6 pads to be so small), the little red pear is from my supplies ....


.... I finished by dabbing over some glossy accents and adding some glitter glass for added sparkle but as always it is very difficult to photograph .....


..... and here is a mini bottle I added that had been coated in gesso then decoart white crackle paste and when dry a little bundled sage distress ink rubbed on.


I hope you like my birthday board - I was going to add Tim's mini easel on the back but my Big Shot has had to go back to Sizzix to be looked at, but I will cut one from white mountboard and add to the back then it can easily stand on a shelf.


There is still time to take part in our CVC challenge of make your own backgrounds and maybe I have inspired you to have a go at this shabby mixed media style.

Enjoy the rest of the week into the weekend.

hugs Brenda xxx