Showing posts with label Fragments. Show all posts

Thursday, 24 July 2014

A floral whisper…

A combination of stamping and die cutting today with my floral whisper card...

FloralWhisper26

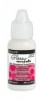
I've started with an 8" x 8" card blank so have cut the mats accordingly. The background started as plain white card dabbed all over with Distress inks (DIs) of Dusty concord, Seedless preserve, Milled lavendar and Shaded lilac. Once inked, the card was misted with water so that the coloured blended together:
FloralWhisper01 FloralWhisper02

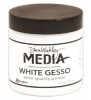
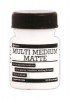
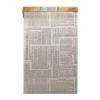
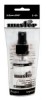
Tissue wrap was torn and glued into place using Matte Medium before dry brushing white Gesso roughly over the top:
FloralWhisper03 FloralWhisper04

Next came the stencilling, two different patterns, again in patches:
FloralWhisper05 FloralWhisper06

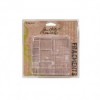
The card needed a mat which was cut and then the centre removed (only the outer edges are seen):
FloralWhisper07 FloralWhisper08

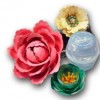
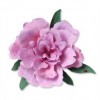
To make the flower, I used certain elements from the Sizzix Bigz Peony die (by Susan Tiernay-Cockburn) although I haven't made it up the way Sizzix have shown. I love the amazing Blooms impression tool (which is hard to keep in stock!) to shape the petals:
FloralWhisper10 FloralWhisper11

Making up the bloom, petal by petal:
FloralWhisper12

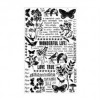
Lin Brown's ELB05 stamp set (Eclectica³ for PaperArtsy) has some beautiful texts based around florals so I chose one from that to stamp and emboss with a lilac embossing powder. This has been cut and mounted on an old (Sizzix) die cut photo frame, decorated with a strip of washii tape and white pen:
FloralWhisper09 FloralWhisper15

The leaves for the flower have been stamped using white (Snow cap) ink and then edged. The ptals have also been 'dusted' with ink around the tops too:
FloralWhisper16 FloralWhisper17

A floral rub-on stuck onto the same colour card as the base and then cut using the Sizzix postage stamp dies makes one decorative element. The scroll from the Sizzix Thinlits Ornate hanging sign (by Jen Long-Philipsen) makes a gorgeous decoration simply by sniping it away from the sign. Both elements have been edged, of course!:
FloralWhisper18 FloralWhisper19

A butterfly and a bee from Tim's Botanical remnant rubs have been used to decorate another corner:
FloralWhisper20 FloralWhisper21

Layered up:
FloralWhisper22

A corner of matching dotty paper from my scrap box has been edged and used under this fragment and added to the top left corner. Left side:
FloralWhisper24

Right side:
FloralWhisper25

Focal section:
FloralWhisper28

Completed:

Most of us love flowers and this card can be used/adapted for any occasion.

Thanks for visiting, have a lovely day,

Chris xxx
My corner of Heaven


Monday, 15 April 2013

Bon Voyage Tag Card

I bet you sometimes feel like me. You're known for 'making cards' (which I actually rarely do) and so people ask you to make cards for them. This is the result of one of those requests! A colleague of my friend is off on a long term business trip and so they wanted to mark the event with a card (and no doubt the obligatory office collection!) 
I took several different blue Distress Inks and tapped them on my craft sheet, spritzed with water and swiped a large #12 tag through the ink. I swiped both sides and did several different layers including a layer of brown inks. I never worry about getting a perfect coverage as the 'mottled' look is a more vintage effect. I used Gathered Twigs Distress Ink for the edges of the card - don't forget to do the inside too! Fold your tag in half.
For the background I used the whole sheet of the Tiny Things Stamp Set. I inked it with French Ultramarine Archival Ink and stamped it onto the tag. Lots of images at once and you don't have to work out the spacing! 
I took some blue paper and stamped the car onto a 2" square piece. I then liberally applied some Glossy Accents to a fragment and then glued the paper and fragment together. When dry I spritzed the back of the paper with water and gently rubbed the paper away. When I had done this I adhered a piece of silver metal tape to the back using the tape's adhesive. I left enough of the front of the paper (the side attached to the fragment) so that the colour and image remain but I wanted a few thinner areas and 'holes' so that the silver of the foil shows through. 
To finish the card I used two Simple Sayings stamps (how incredibly useful are these?!) and added a hitch fastener as a closure. I hope you like this - why don't you make one and enter the latest Butterfly challenge over at our challenge site?!