Hi, it's Brenda with you again today and I'm going to show you a quick background using DecoArt's Decou-page glue/sealer. I got carried away making an easel card on a canvas board with my technique practice piece for the upcoming workshop (details can be found HERE if you would like to see more about it) and forgot to take photos, but here are some using card.

I began by using a baby wipe to blend over a light cover of hansa yellow medium fluid acrylic paint. The canvas board I used had been sealed and I should have given the card a coat of clear or white gesso before I started and would recommend you do so if using card as your base.

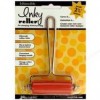
Give the background a quick blast of the heat gun to dry it off and then brayer small amounts of the decou-page randomly over it.

Again heat dry, lightly spritz over with water it and still using a babywipe gently rub over cadmium red hue. You can see how the decou-page has acted as a resist.

Repeat the deco-page layer again and the last step this time using quinacridone burnt orange. You can see the yellow and red through the darker orange colour.

Finish by lightly brayering titanium white over the top to create a bit more depth and some added interest.

So here I caught up with the same steps I had followed on the canvas and you can see how different it looks. The canvas took the colours in a completely different way and the results are paler and more subtle. You can also see the linen texture of the canvas itself.

I finished it by inking the edges and simply with some autumnal berries and flower. I was tempted to add some background stamping but as I had done that on the mini harvest board I left well alone. You know that feeling - should you add something more or not??? But I was glad to be using my little practice board and not letting it go to waste.

A few simple autumnal embellishments and we're done.

I hope you enjoy having a go at this quick background and if you do, please let us know.

hugs Brenda xxx
TOP TIP
Don't forget to wipe over your roller with a clean babywipe after each time you use it with the decou-page otherwise the glue will dry quickly and gunge your roller up.