Showing posts with label Crazy Cats. Show all posts

Thursday, 14 July 2016

Crazy Cat Canvas

It's been a while since I posted a Crazy Cat project! I have made quite a few of these little canvases for the craft shop I am part of  - so thought I would share a couple with you today. Sorry I don't have any process photos for this one but here are the steps:
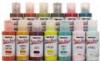
  • I start with 4 inch square canvases (10cm sq) and give them a coat of gesso followed by whatever my base colour is going to be. I mostly use PaperArtsy Chalk paints for this.
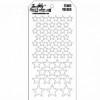
  • Once dry I add some stencilling or stamping in the background. In the one above I used Tim Holtz layering stencils - bubble, stars and schoolhouse. I take a little cut and dry foam and add just a little paint to use through the stencil. Archival ink works perfectly too.
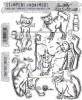
  • I take my chosen crazy cat and emboss with clear embossing powder / versamark on white card. I then take whatever ink I am colouring the cat with and ink the whole cat - no need to do this perfectly as I then die cut the image.
  • I stamp and cut the eyes of the cat again and colour with different colour ink.
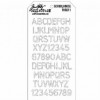
  • My words are computer generated - printed, add a little ink as required and some black pen and cut them out.
  • I then glue both the cat and words to the canvas and seal with matt medium.
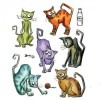
Here are a few more examples!


Nikki


Thursday, 24 March 2016

Wildflower and Crazy Cat birthday

Hi everyone. Today I am sharing this birthday card I made using the fabulous wildflower dies, one of Tim Holtz's releases this year.
I started by taking the latticework stencil and applying some versamark with cut and dry foam. I then sprayed with distress sprays - (scattered straw and bundled sage) and a little water.
I allowed this to dry and then cut an oval from the middle and also pencilled the same size oval another piece of card.
I added some distress ink to the card covering the area of the oval and splashed a little water on it.
Once dry I stamped my crazy cat - half way across the oval - and coloured using rusty hinge distress ink.
I die cut some wildflowers and coloured with distress inks.
I added some vintage photo to the edge of my top layer and round the oval aperture.
See you next time.
Nikki


Friday, 12 February 2016

A little bit crazy...

 Tim Holtz Crazy Cat Birthday Card
Hi everyone. Today I thought I would share a couple of cards - different focal point but a similar process of combining embossing and stenciling.

1. For the Crazy Cat card above I stamped 'happy' a few times with versamark and embossed with clear powder.
2. The next stage is to cover the card in a pale colour of distress ink - here I used antique linen.
3. Next take your choice of layering stencil - I used 'scribbles' on this one and ink with a darker colour. (Bundled Sage) I pretty much stenciled the whole card here but for my second card I only partially covered it.
4. Once I was happy with the colour I wiped ink off the embossed area and stamped my Crazy Cat in archival ink. I took my water brush and lifted some of the colour away - I wasn't trying to remove it all, so just used water and a piece of kitchen towel.
5. Finally I added some colour back - I chose broken china.
Sorry horrible photo!
6. I matt and layered my card on white and then another piece coloured with bundled sage.

The second card is similar but instead of stamping an image I added some stamped and punched butterflies from my stash.
Birthday Card - Addicted to Art

Until next time... happy crafting!
Nikki