Hello all! Alison here from Words and Pictures... I'm so happy you stopped by. I hope you had a wonderful day yesterday, and are now settling in for the lovely 12 Days of peace and quiet after the chaotic preparations and busy day itself. I've a pair of tags for you today which took advantage of leftovers and mop ups, and pretty much made themselves!
I started by brayering some gesso which was leftover on the craft mat on to a few tags to use it up. As you can see, some tags got more gesso than others... Here they've also got a couple of Distress Paints brayered on and then spritzed to soften and blend them. I think I used Stormy Sky and Iced Spruce, and possibly some Hickory Smoke or Pumice Stone - I forget now.
I left the most heavily gesso'd tag for another time and focussed on these two. I added a few strips of tissue tape and then spritzed Stormy Sky Distress Spray through one of my favourite Layering Stencils - Festive. I turned the stencil over to print the excess ink onto the second tag so you get a reverse image (and you don't waste your ink!).
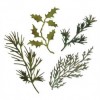
Like many of you, I had lots of "negative" fronds of greenery left from punching the branches for my December Tim Tag.
Rather than throw them away, I decided to trim some of them and press them into use as panels on these tags.
A couple of Idea-ology Photobooth photos take their places. In my head as I was making the tags these two are both single, and each has spent Christmases alone for the last few years.
But now, like one of those Hollywood films, fate is bringing them together in time for Christmas Eve.
I stamped one of my favourite festive PostCard stamps in Coffee for extra background detailing, and added some holly leaves, cut with the Holiday Greens Thinlits, and Christmas Typed Tokens, altered with some Mushroom alcohol ink.
And some ChitChat stickers help to spread the love...
... bringing the two lonely people together to share some laughter and kindness.
The tags work individually I think...
... but really they were created as a pair.
There's a symmetry in the composition which means the meeting is inevitable. If you position the tags one way, they're still apart...
... but swap them over and you get your happy ending - so you just know it has to work out. And that of course is what brings the sunshine out!
Thanks so much for stopping by today, and I'll see you again soon. Enjoy your 12 Days!
Alison x
Words and Pictures
Saturday, 26 December 2015
Thursday, 24 December 2015
Merry Christmas One and All
Hello Everyone !
Jennie here today to wish you all a very happy Christmas Eve
and to share the last Christmas project of the year.
Tim Holtz introduced us to a fabulous linen look technique in his November tag and I have to say I absolutely love it and can't stop using it as it is such a fabulous background for so many stamps. Click the link HERE to go to Tim's blog and details of the technique.
I have used Antique Linen for the background over a base of Picket Fence Distress Pain. I have used a little bending as well as the Wrinkle Free Technique. I have blended some Vintage Photo Distress Ink around the edges and done a little stamping with Gathered Twigs.
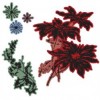
I use this Poinsettia stamp and die throughout the year for birthday cards, but thought I ought to give it a Christmas outing. I have stamped the bouquet with Festive Berries Distress Ink and added a little Aged Mahogany around the edges. I love how the die cuts everything out so beautifully. I layered the large cut out on my card with foam dots and then cut the smaller flower on its own and layered this also with foam dots.
And there you have it! A vintage style Christmas card which could easily
be adapted to a birthday card.
And so to Christmas ……...
On behalf of all of us here at Country View Crafts Project Blog
may I wish you all a very happy and peaceful Christmas.
Jennie x
Labels:
Cards,
Christmas,
Distress Ink,
Framelits,
Jennie,
Stampers Anonymous
Friday, 18 December 2015
25th December
I am really getting excited for Christmas now! All my preparations under way - presents wrapped, decorations up and now I able to play and make things that make me happy! I chose to make a giant Christmas tag and used a mdf one I bought at a craft show.
I used lighter and darker blue paints. The darker paint I put on with my fingers! I then gave the whole tag a good sand so that the background is more subtle and looks a little worn.
I added the snowflakes in a random pattern (are here ever truly random?!) and then added a little paint some of them. The final touches were to add a 'ribbon' (washi tape) and label. I had the hand left over from another project and it seemed perfect for this tag!
I used lighter and darker blue paints. The darker paint I put on with my fingers! I then gave the whole tag a good sand so that the background is more subtle and looks a little worn.
Thank you, as always for popping by - I hope you, and yours, have a lovely Christmas
Subscribe to:
Comments (Atom)


