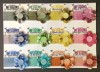
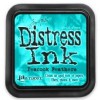
Infusions are little bottles of powdery goodness that have so many possibilities that you'll be discovering new things for months! Each bottle has a coloured stain in powder form as well as some walnut (brown) powder that creates a really grungy effect.
If you are lucky enough to see them demonstrated there are two main ways to use them. Firstly, add a small amount of the powder to the paper
Spritz with water to release the colour in the powder - the more water you add the more of the brown you will release - so experiment to see the different results you can get. As you can see from the photo I spritzed pretty well and left it a few seconds for the two colours to work their magic! When dry you will get a cool vintage feel.
The second way is to add some medium to the page and cover it lightly (I use and old gift card or palette knife)
Then, whilst still wet, sprinkle the Infusions and drag a little more medium over the page using the card. You can drag the medium down the page and, using the build up on your card, drag it from side to side too.
You will create a really cool, effective background that will take stamping, stencilling and anything else!
For a few more examples of this technique, please pop over to my
blog.
So, for today's project I used the second technique to create a page in my new journal!
I added a blue Infusions at the top of the page and a green at the bottom. In doing so I wrinkled the page which created a really lovely it of texture - I've kept this in to remind me that it prompted another idea that I must try!
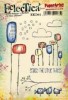
I stamped all the images o the page and also on a piece of card. I coloured the images in, cut them out and adhered them in place.
I hope you enjoyed this brief look at Infusions - for my second piece this month (on 18th May) I have used them again, but with a slight twist! I am always learning! Thank you, as always, for popping by.
Gabrielle x