Showing posts with label Canvas. Show all posts

Tuesday, 17 July 2018

Wallpaper and dress forms

I thought I would make an easel card using the Tim Holtz wall paper and his inventor 3 set of stamps with the lovely dress forms. You could use the composition and ideas to make an ordinary card but I have gone with the faux encaustic again.


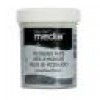
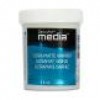
Cut some thin greyboard and adhere a piece of the wall paper onto it using decoupage and then seal it with the same product. You will see that decoupage is very versatile and can be used as a glue, a sealer between layers and as a finish (top layer like a varnish). Scrape a thin and random layer of decoart crackle paint over and leave to dry.


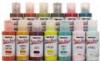
I stamped the dress forms using black archival and then took greyish blue and neutral grey Amsterdam inks to paint n some of the dress form bodies and frames.


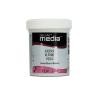
I distressed the edges of the panel with a distressing tool and blended in ground espresso distress ink knowing it was likely to move and seep a bit with the layer of DecoArt clear modeling paste on top. 


I stamped the scissors onto matte silver card, cut them out and again blended the brown DI around them and then laid them into the top of the paste just very gently pushing them into it.


The next layer I painted the scissors with a little raw umber and yellow oxide to tarnish them a bit, added some words and the gave another coat of clear modeling paste and added half a snap fastener as an inclusion.


I coloured up a canvas board using cerulean blue, light grey, titan buff and titanium white with a wet wipe to blend the colours. I gessoed using a brayer to create some highlights and then gave it a 'dirty' wash using burnt umber, raw umber, cerulean blue and titan budd with some decou-page sealer and water. I'll have a mini tutorial in my next post at the end of the month to see this with photo steps, so keep an eye out for it.


Eh voila, I just needed to add a mount board easel and it's finished.


I love making these easel cards, they don't take much longer than making a card one but they certainly have more impact especially if you can hand it to a friend but even paying the extra postage is worth it for a special occasion.


 Thanks for stopping by, see you at the end of the month.

hugs Brenda xxx

www.bumblebeesandbutterflies


Tuesday, 28 November 2017

Fragile Winter - Brenda

I'm sharing a project with you today both here and over on my blog at Bumblebees and Butterflies. It is a mixed media canvas with layered snowflakes that I created for the Craft Stamper magazine last year, the process steps for the canvas background can be found HERE  and the steps for making the snowflakes are below.


Step by Step


1.    Die cut all the snowflakes from good quality card and seal them with a coat of gesso. Emboss them all using the embossing folder that accompanies the layered snowflake die.  


2.    Take each snowflake one at a time, spritz with water and dab on chosen colour of paint, add a second colour whilst still wet and heat dry. 


3.    Turn your snowflake over, you will see the colours seeping underneath the edges and being soaked up by the non-sealed card. 


4.    Continue to add layers of water and colours (and mix colours to create various combinations), until you are happy with the results. 


5.    On some you could add more interest and lighten the snowflake by rubbing white paint over it using your finger and keeping very little paint on it. 


6.    On others try adding transparent crackle glaze or gloss varnish, then white or black antiquing cream and rub the excess off with a damp cloth and finish with some gems given a quick coat of gesso or paint.


To finish seal the snowflakes with a coat of ultra matte or gloss varnish, stack some of them together and perhaps adhere some glitter. Add them to your Fragile Winter mixed media canvas where the process steps can be found at Bumblebees and Butterflies.


Have fun with your Christmas crafting.

hugs Brenda xxx


Products


Friday, 27 January 2017

Canvas Board

Hi it's Brenda here again today.

I am using one of my most loved canvas boards which is 5 x 7 ins in size. I have made a fairly simple textured background and then take bits from my 'left overs' box to die-cut the dapper man and create a card.

.
I began by taking a palette knife and mixing DecoArt modeling paste and white gesso together in about a 50:50 mix and then roughly spread it over the surface leaving some of the canvas board exposed and left it to dry.


Choose three colours that will tone and blend together well and not create 'mud', ie 3 warm colours, 3 cool colours or take one colour and make a tint and a shade of it to go with the original.
(In color theory, a tint is the mixture of a color with white, which increases lightness, and a shade is the mixture of a color with black, which reduces lightness. A tone is produced either by the mixture of a color with gray, or by both tinting and shading).

Take blue-green light media fluid acrylic paint, mix with water to create a very watery wash and dip the board in and dry it.


Repeat the above step with burnt umber.


Take blue-green light, mix with titanium white and drip the paint through the canvas, spritzing with water and heat drying when you are happy with it. Repeat with burnt umber mixed with titan buff.


Blend over evergreen bough distress ink, flick with water and roll dry with kitchen paper.


Repeat with vintage photo and again with evergreen bough to get depth of colours.
Give a coat of ultra matte varnish to seal the distress inks. Be very light with the brush otherwise the varnish will move the distress inks around.


Rub a coffee archival ink pad around the edges and over the high points.


Then choose the elements you want to add to make a mixed media piece of art or you could add an easel and give it as a card.


I love mixed media backgrounds, hope you like this one.

Have a great weekend.

hugs Brenda xxx


Thursday, 14 July 2016

Crazy Cat Canvas

It's been a while since I posted a Crazy Cat project! I have made quite a few of these little canvases for the craft shop I am part of  - so thought I would share a couple with you today. Sorry I don't have any process photos for this one but here are the steps:
  • I start with 4 inch square canvases (10cm sq) and give them a coat of gesso followed by whatever my base colour is going to be. I mostly use PaperArtsy Chalk paints for this.
  • Once dry I add some stencilling or stamping in the background. In the one above I used Tim Holtz layering stencils - bubble, stars and schoolhouse. I take a little cut and dry foam and add just a little paint to use through the stencil. Archival ink works perfectly too.
  • I take my chosen crazy cat and emboss with clear embossing powder / versamark on white card. I then take whatever ink I am colouring the cat with and ink the whole cat - no need to do this perfectly as I then die cut the image.
  • I stamp and cut the eyes of the cat again and colour with different colour ink.
  • My words are computer generated - printed, add a little ink as required and some black pen and cut them out.
  • I then glue both the cat and words to the canvas and seal with matt medium.
Here are a few more examples!


Nikki