Showing posts with label glimmer mists. Show all posts

Saturday, 6 September 2014

Winter candle

Hi everyone, Amanda here again, this time to share one of my favourite techniques - decorating a candle by melting a tissue paper design into the surface.  For this project I've used inks and a die, but you can also stamp a design onto the tissue paper.  Once decorated, keep your candle in a cool place, out of direct sunlight.  As well as the kit from the shop, you'll need a plain white candle, white tissue paper, greaseproof paper, and a soft cloth.  I hope you like it!


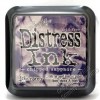
First I mixed peeled paint and vintage photo distress inks together on a craft sheet and misted with water.  Then I laid some tissue paper in the ink.


Next I put some black soot distress ink on the sheet, misted with water and dragged the still wet tissue paper through it before setting aside to dry.  If you're in a hurry, you can dry it with your heat gun.


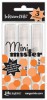
I folded the tissue paper in half and die cut 4 double thickness mini pine trees.  I dabbed the trunks onto the vintage photo ink pad, then sprayed with water to blend and let dry.


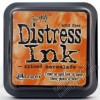
To make a wintery sun, I dabbed a little spiced marmalade distress ink onto my craft sheet, misted with water and laid more tissue paper in.  Once dry, I die cut a small circle.

Next, I melted the trees and sun onto the candle.  I laid each one in place and smoothed flat, then wrapped tightly with a piece of greaseproof paper.  I gently heated the design with a heat gun until the wax just melted through - you can see when this happens, as the colour of your design shows more brightly through the greaseproof paper, as in the centre of the tree here:


For best results use a new piece of greaseproof paper for each shape, to avoid a build up of wax  that can make the surface lumpy.  Take care not to keep heating once the colour changes, and peel the greaseproof paper away quickly and carefully.  Before the wax hardens again, buff the surface with a soft cloth to smooth it out.


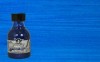
Once all the tissue trees and the sun were melted into place, I applied streaks of chipped sapphire and spiced marmalade distress inks and midnight rendezvous glimmer glaze with a cloth to get a pale wintery sky.  Excess colour can be removed either by polishing 
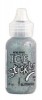
with a cloth, or with a little blending solution.  Finally, I added a little frosting on the trees using Stickles diamond and silver glitter glues.


Thanks for reading, and happy crafting!

Amanda

Tuesday, 26 March 2013

Recipe Book by Chris W

This is the last Easter post from me using the Easter die and stamp set. Even if you don't bother celebrating Easter this set is well worth having for the brilliantly useful egg dies as you will see!! This make is a little more difficult but still at an 'intermediate' level so nothing too hard.


If you don't have a basket die you can use a decorative oval instead.


Binding the pages with the Bind-it-all or the Cinch makes putting the pages together so easy. Simply wave a ribbon through the binding wires and tie at the top to add some interest.


Inside you can label and decorate the pages however you want to, to personalise to you or for someone else. Writing your recipes on a tag and slipping inside is a kewl way to keep them.


You could also change the orientation of the book if you so wish. Using it this way the book will stand up by itself.


Whether you shabby chic it, glam it, grunge or distress it, it makes a great little present. I know exactly who is getting mine and it's gone into the Christmas box already [g]. If you would like to view, download or print the instructions (with photo's) you can do so by clicking HERE.

Have a happy Easter everyone.

Chris xxx

Friday, 22 March 2013

Easter ATC by Chris W

Here's a simple little ATC you can make and trade with your ATC friends for Easter.


Using this lovely little Easter die and stamp set it literally took minutes to make. I also used an ATC die to cut the board it's made with. (The Tim Holtz ATC die with corners is in the sale at a snip of a price at £6.99!!!!!) Cover your ATC with paper then cut the chick, the eggs, the grass and the letters. Stamp a couple of chicks onto shrink plastic, colour and shrink with your heat gun. Speckle the eggs using glimmer mists or spray inks then colour the grass with Distress markers. Tuck one of the eggs behind the grass to the bottom left and  glue into place (portrait orientation). Add the other egg to the right and glue into place followed by he chick, centred. The two little 'shrunk' chicks can be placed over the grass to the left. Simply cut your letters using an alphabet die and highlight the letters with a white pen. Hey presto, you're done!

Hope you're having fun making your Easter goodies, please stop by again soon.

Chris xxx

Wednesday, 20 March 2013

'Which came first?' Easter card by Chris W

The quirky little chick and eggs Easter set of dies & stamps by Stephanie Barnard at Sizzix is very versatile and to prove it I'll be blogging a number of pieces using them on the run up to Easter. The first is this simple Easter card...


As well as using the Easter set, I've used the fabulous Sizzix Harvest Bucket (Originals) die. This has been retired now, which is a great shame, and it's in the sale at the ridiculous price of £4.99. There aren't many left so grab it whilst you can, it's been a firm favourite of mine for years!

The card itself is very easy to make so even the newest newbie can attempt it (click HERE to view, download or print the instructions). Using ink sprays or glimmer mists to 'speckle' the eggs is effective and it's just a case of layering them behind the bucket.


The cheeky little chick just finishes the card off. It definitely reminds me of the saying "What came first, the chicken or the egg", lol.

Thanks for stopping by, feel free to comment if you have the time.

Chris xxx