Wednesday, 23 April 2014

Peony Creations


Hello Everyone! I am sharing a wallet card with you all today but in particular this handmade flower which I have made using the Spellbinders Grand Peony Creations Die. More of that later, first I will show you the wallet.

I used the Tim Holtz Alterations Pocket Envelope to make my wallet - I just cut off the top and punched a half circle in the top to make it more "wallet" like!


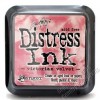
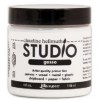
After making up the envelope I used one of my favourite embossing folders to create the texture and inked it up with Victorian Velvet Distress Ink.  It looked a little too pink for my papers so I gave it a coating of gesso to tone it down a bit.


Then I started layering some scraps I had lying around on my desk - a doily die cut I didn't use from another project and some Maja Design Scraps.  Susan has some wonderful new Graphic 45 papers in stock at the moment and these would make perfect embellishments too.


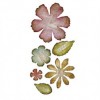
And so to the flower.  For the large flower I used dies 4, 5 and 6 (one being the smallest) and cut two petals in each size.


I gathered them together with a brad, spritzed water on the top layer and started scrunching the petals up around the brad.  I did this for each layer until it looked like this.


Normally I would leave the flower to dry at this point, but just lately I have been using a knitting needle to curl out the outer layers while the flower is still wet.  You need to be careful as the paper is a bit sodden but what happens is you get all the wonderful creases in the the curl - and I am just loving this technique at the moment!


Once the flower was dry I added it to the front of my wallet with some scrim and string and a handstamped sentiment.


I also made a smaller flower in the same way for the top of the tag.  You will see that I also embossed my tag with the same embossing folder after I had adhered the paper - it just gives a little more texture and interest to the papers.


And so here it is!
All ready for a friend's birthday next month.

Thank you for visiting!


Monday, 21 April 2014

Keeping it neutral !

Hello, it's Sue here and today I'm sharing a canvas that was also something of a challenge for me, as I've kept it very neutral ! I had to try really hard not to reach for some stronger colours !


While I was searching through sonme papers I came across the above that gave me the idea for the colour palette of this piece. (I didn't use the paper in the end though!)


I started by using JOFY 007 stencil with Grunge Paste, when this was dry I painted the canvas with Stone Fresco Finish paint. I then used the JOFY 008 stencil with Nougat Fresco Finish paint.


I also carried the stencilling around the edge of the canvas. 


 I blended some Irish Cream and Moccha Mousse Fresco Finish paint around the edges with a baby wipe. Then I replaced the JOFY stencil and used a little Irish Cream and Moccha Mousse in the centre of the flowers.


I then added a little Spanish Mulberry Fresco Finish to the centre of the flowers. To create more definition around the seed heads I used a small definition brush and painted some Moccha Mousse down one side and blended the paint using a baby wipe.


I then used the Vintage Cabinet die and cut the shape from some cardboard, tearing a little of the top layer away. I then used Grunge Paste with Lin Brown's 006 stencil, only stencilling around the edge as I will be covering the centre. 


I die cut another Vintage Cabinet shape from chipboard, this time using the smaller Movers & Shapers die.  I covered it with a piece of paper from the Chatsworth Collection, then blended Stone Fresco Finish over it and dry brushed some Chutney around the edges. The beautiful stamped image is from the Lynne Perrella 027 set. I've stamped it onto some Smoothy card that's been painted with Nougat Fresco Finish paint then used Claret Fresco Finish paint to highlight areas of the image.


The large flower is plastic and I've painted it with Fresco Finish paint and then I've brushed it with some White Fire Treasure Gold. The leaves have been die cut from Smoothy card using the Tim Holtz Garden Greens die and painted with Stone Fresco Finish paint and then I've used a baby wipe to dab Irish Cream and Moccha Mousse onto them.


 All of the embellishments have been brushed with Stone Fresco Finish paint and then brushed with Treasure Gold. I've also brushed some Treasure Gold over the seed heads too.


The Word Band, flowers and bird cage have also been painted with Stone Fresco Finish paint then brushed with White Fire Treasure Gold.


To finish I added some buttons that have been painted and brushed with Treasure Gold too.

I hope you've enjoyed today's project.

Sue
x

Friday, 18 April 2014

#iloveyou

I get asked lots and lots how I make my heart with leaves that I use probably too often! The short answer is I use Wendy Vecchi stamps which involves a lot of fiddly cutting out on the leaves. However, now I am in possession of a fabulous brand new die I thought that you might like to see another version using Tim Holtz dies!
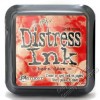
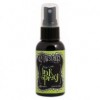
I first came across Country View Crafts when buying Tim Holtz dies and they are still my go-to place for anything Mr Holtz, and, well, everything! The heart and arrow is from the Love Struck die and the leaves from the new (and utterly indispensable!) Garden Greens die. I'm not trying to spend your money for you (!) but if you don't have this die yet you won't be disappointed when it arrives...! A tip - when using grungepaper (like I did) for the leaves, cut one set of leaves with the grungepaper facing one way, and then the other set with the paper the other way up. That way the nap of the paper will be the same!!! The heart was coloured with Barn Door Distress Ink and the arrow with Vintage Photo Distress Ink. The leaves were sprayed with Lime Green Dylusions Ink and a little Peeled Paint Distress Ink added to the tips. I lightly stamped a number stamp onto the leaves using Fern Green Archival Ink.
The flowers are the smallest flowers from the Tattered Floral die and Jumbo Tattered Florals. They were painted white and then Barn Door Distress Ink added to the larger one and then stamped with the ruler stamp from the Artful Tools set. Round the edges of each flower I used my Barn Door Distress Marker and then secured them with a brad.
As I'm using dies I really love to use the banner die and it works really well with the new Hashtag stamps! For the background I covered an ATC with white paint and stamped the ruler stamp when it was dry. I dries it throughly and then sanded it down and edged it with my favourite Vintage Photo Distress Ink!

I hope you liked my alternative version of my heart and leaves - feel free to show me your versions!


Wednesday, 16 April 2014

A bit of fun with masks...

....I love playing with masks, such a useful bit of kit to have in your stash and the That Special Touch masks are great.....have to admit I have rather a lot that I've collected over time! So for today's card I've combined my beloved masks with my favourite inks.....distress....for a bright and cheery card that's quick and easy to make.

Started off by blending Picked Raspberry, Ripe Persimmon and Mustard Seed distress ink onto a piece of white card. Then I laid on the That Special Touch Squared Mask and wiped over to remove some of the ink...
Then I took the Floral Lace Mask, laid it over the top and blended on some Pumice Stone distress ink....
Then it was just a case of cutting it out, mounting it up onto a card and adding a sentiment. A quick and fun card.
Donna xx

Monday, 14 April 2014

Friends forever

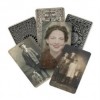
Well trace here today with a vintage style layered hanging piece . I love playing with layers and with so many gorgeous new Tim goodies out there I just wanted to play. The found relatives cards are so gorgeous and this photo took my eye, and the piece grew from there. So here is my make for today :
I started with a piece of French Industrial paper stack, new paper for me and just so gorgeous . I glued this to a piece of mountboard and then sanded the edges and inked with walnut stain DI. Then let the fun begin. As soon as I saw this found relative photo I knew it had to be the focal point, just so gorgeous. I took a large cabinet caard and carefully removed the back from the front , as they are so gorgeous and i wanted to use both!
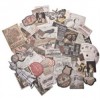
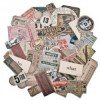
I placed on the base and added layers using various pieces from the ephemera packs, which are full of gorgeous pieces..perfect for adding layers..Then I collected varioous pieces of idea-ology and laid these on until happy with the layout.
So for the left hand side :
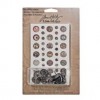
I added tissue tape, a piece of die cut from the new framework trellis die, a timepiece and spinner and plenty of remnant rubs. I also added some chit chat stickers..just love the detail they add and here I nked the edges with walnut stain DI.
For the right hand side :
I added more remnant rubs, more film strip and more ephemera pieces and a word band. More tissue tape, a small paperclip, more trellis die cut . I added elemnts across the whole piece like the tissue tpae as these helped to tie the piece together . 
This was such fun to make and would be great with old family photos too.