Sunday, 24 August 2014

Be you…

When we think of bees many of us think of the plump, furry bumble bees we see so often but many of our honey bee species are quite wasp like in their appearance. This is the case for the honey bee featured in Wendy Vecchi's 'Art for you' stamp set…

BeYou23

Starting with DIs Tumbled glass, Salty ocean and then Wild honey, each in turn daubed on white card and then misted with water to soften the edges of the colour and let them blend into each other:

When dry, black archival ink dabbed in patches onto the large honeycomb stamp (which also looks like chicken wire), randomly stamped over the top:

The bee was stamped with black DI onto coloured card and cut out. The wings were cut separately and covered with Crackle accents:

The text stamped and mounted:

Flowers die cut and punched, made up and lightly edged with DIs:

Layering up:

Top right:

Bottom left:

Bottom right:

Complete:
BeYou17

Another quick and easy card to make. And here's a plea, we are losing our populations of honey bees so please do all you can to keep them going by planting flowers and shrubs in the garden that they like! >:o)

Have a fab weekend everyone and thanks for stopping by.

Chris xxx


Friday, 22 August 2014

Procrastination!

When it comes to household tasks, I love to procrastinate!!! I really enjoy coming up with credible reasons to avoid doing the washing - more specifically the resulting ironing! So when I found this quotation (by Dana Spiotta) it really spoke to me! I often start a project by finding the quote first and this was very much the case here.
The background was created with a palette knife, building very thin layers of paint. The red paint was a little too strong so I wiped it off with a baby wipe - it looks better as a hint rather than a bold statement! Then I used a circle stencil and used cut and dry foam in paint to make circles - then I added a little white paint to the original colour to make it lighter. Where you see green paint it is a mix of the blue and yellow. With the stencil back on the circles, I stamped a number stamp so the design is just in the circle.
I stamped four shirts and three pens onto tissue paper and painted the reverse. I used the pens as props to hold up my washing line! If, like me you love words then our current challenge is for you! Why not have a look and join in?

Wednesday, 20 August 2014

Where There is Tea There Is Love


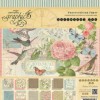
Hello Everyone and welcome to my second project this month where I am again using the Graphic 45 Botanical Tea Papers - they are just so gorgeous I could play with them forever! I have chosen to make a 6 x 6 card layering different elements from the Botanical Tea 8 x 8 paper stack.


When making a layered card such as this I like to machine stitch around the edges as it does make for a good even finish. My machine is set up permanently with white cotton and I always make sure that I can get it onto the table and plugged in quickly - it is the only way! Make it easy and you will use it!  When machine stitching don't glue everything down just add a little bit of tape runner to the middle of the piece just to hold it in place otherwise you will gum up the machine.


I have now added some more layers and although the little stamps are difficult to stitch around it is worth it for the final effect. I find stitching on paper far easier than material as it doesn't move! And don't worry about the tension at the back - no one is going to see it.


You can also see that I am using a label with a piece cut away for another project. My cluster of flowers can cover this area and so layering is another great way to use up all those pieces.


And then it was down to making a few embellishments. Flowers and leaves were cut from the same papers for consistency and a white lattice border just adds a little barrier between the background and the flowers.

Thank you for joining me today and I hope you are having as much fun with these papers as I am!

Jennie x

Live the Dream