Wednesday, 18 November 2015

Layered Christmas Tree Card

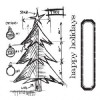
Today I have a Christmas card made with Tim Holtz Tree blueprint and framelits. So sorry I have no step by step photos of this one. I started with white card and used distress inks in blueprint sketch and stormy sky to add some colour before spritzing and flicking on some water. Once dry I added some vintage photo around the edges. I then stamped the Christmas tree from the stamp set.
I stamped the image 3 x on another piece of card and used the framelits to cut the three layers before inking with various greeny / yellow tones (shabby shutters, pine needles and mustard seed).
I edged all the layers in vintage photo again before building up my layers using foam pads.
I added a little colour with my water brush to my baubles and star before stamping, die cutting and colouring the greeting.
Thanks for stopping by - see you in December!
Nikki Acton

Saturday, 14 November 2015

Scarecrow Snowman

Hello all, it's Alison here from Words and Pictures, and I'm so happy to be here to share my first project with you at the Country View Crafts Project Blog.
I'm starting with a simple winter tag using one of the recent JOFY releases from PaperArtsy.  In my head I think of this little chap as a Snowman, but really he's a Scarecrow... isn't he?  Then I end up with random words like "Snowcrow" in my brain!


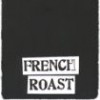
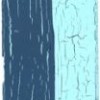
I used PaperArtsy Fresco Finish Chalk Paints and Crackle Glaze to create the background.  The first layer is French Roast with some Chocolate Pudding to make it a bit more opaque.  You can see the colours in the dark crackles.  Next is a thin coat of the Crackle Glaze.  I usually apply mine with a palette knife - I just find it easiest to control that way.


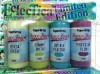
Over the top of that I put a coat of Snowflake with just a hint of Mermaid in places.  The rest of the colour came from very thin washes of Captain Peacock (from the new Limited Edition collection) once the Snowcrow was completed.


I stamped him in Black Archival with some Potting Soil and Plum added in places, just to give a hint of variation - I think you can see the effect best in the sentiment below - and then embossed with clear embossing powder.


Having the image embossed makes it stand out against the background, and also makes the "colouring in" much easier!  I used various blues and browns - all Fresco paints - and applied them in washes using a water brush.  I like building up layers of translucent colour so that you get depth and texture.


All looking fine so far, but it needed something else, so I stamped the fabulous stars as giant snowflakes and embossed them in white for a touch of frosty dimension, before adding just a hint of Vintage Photo distressing around the edges, and shabbying them up a bit with the Paper Distresser.


So, that's my Snowcrow for you - I hope you like him.  And I've just realised this is another tag which could serve as inspiration for the Colour Blue theme at Country View Challenges this month!  Thanks so much for stopping by, and I'll see you again soon.

Alison x


Thursday, 12 November 2015

Noel

Good morning everyone, Jennie here for my first share of the month. 


Regular followers will know that I am a great fan of 4x4 cards, so here is a little bit of inspiration for your Christmas box given that Christmas is winging its way nearer and nearer.


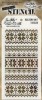
I started by applying Texture Paste through the Holiday Knits Layering Stencil. One of the reasons I love 4 x 4 cards is that these layering stencil's are just under 4" wide - perfect !


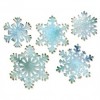
While the paste was drying I die cut the snowflakes in white card and gave them a coating of Picket Fence Distress Paint and gave them a blast with the heat gun. Try and get little bits of paint to puff up for some texture. When completely dry I added  Alcohol Ink - straight from the bottle! Don't bother about getting a full covering - see the next step!


When the alcohol ink had dried I blended Gathered Twigs Distress Ink into the areas which hadn't taken the ink. A great effect and so quick and easy to do. I use this technique a lot and really came by it by chance when I was trying to get some texture and colour onto the snowflakes last Christmas.


Then it is just a case of layering the snowflake on your card. I die cut a Christmas sentiment and gave it the same treatment as the snowflake - a little more difficult as it moves around a bit!


A relatively simple little card which is easily made as a batch but really looks as though it took ages to make !!

Catch me later in the month when I'll have another 4 x 4 card to share with you.

Jennie x