Wednesday, 16 December 2015

Distress Glazed Snowman

Time for another Christmas card and I thought I would use Tim Holtz distress glaze, which I haven't really had chance to test out yet. Great stuff - if you use it right - which I didn't the first time!
I stamped my blueprint of the snowman on some card and used distress inks to colour him in. For the snowman I used iced spruce just to give a hint of colour. I then took the distress glaze and rubbed a small amount over the area I wanted to protect. I used my finger mostly but a small brush around the edges of my image - although I didn't mind it not being perfect.
I then added some darker colours to my craft sheet and spritzed before placing my card in it.

You can see on the image above how the glaze resists the watery ink.
Now at this point impatience got the better of me and I decided to heat dry the ink. Not thinking! Of course this melted the glaze and so the effect was lost. Good job I had stamped 2 cards.

For the second one - no heat gun. I cut Merry out using the alphanumeric thinlits and then mounted on a blueprint sketch inked matt layer.
In the end I actually added the letters back but in a different colour. I added few snowflakes I had lying around (Tim Holtz bigz die - a little crackle and some paint) and some speckles of picket fence distress paint on a dots stamp for snow.

For the snowman I heated - he wasn't wasted - I cut him out and made a second card...

Thanks for stopping by today - I wish you all a wonderful Christmas!
Nikki


Saturday, 12 December 2015

Sparkling Woodlands Tag - by Alison

Hello all, Alison here with some sparkling fir trees for you.  I don't break out the glitter very often, but if not at Christmas, then when?!  And after a brief skirmish with the bright traditionals, red, gold and green, I'm back in my neutrals comfort zone... in fact pretty much monochromatic.


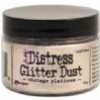
It's also my first time having a play with Tim Holtz's new Vintage Platinum Glitter Dust... I think it probably won't be the last!


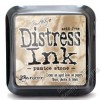
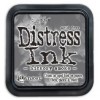
For the background, I swiped Ground Espresso, Pumice Stone and Hickory Smoke inks on to my craft mat and did some wrinkle-free distress technique on to the tag.  It turned out there was more Ground Espresso than the rest, so it all got rather dark rather quickly.  I spattered some Fresco Snowflake over it to lighten things.


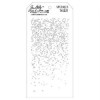
Then I thought it would be nice to have some snowfall, so I used the Speckles layering stencil to add some more white paint, and sponged a bit on to the foot of the tag too, to create some snow drifts.  I decided there wasn't quite enough snowfall, so I added a couple of spritzes of DecoArt Media Mister in White Shimmer.


Turns out that was a good idea, as you get a whole lot more shimmer into the bargain!


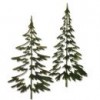
The trees were cut using the wonderful Woodlands Thinlits, and I painted them with some Ground Espresso Distress Paint so that they would be the right colour under the glitter dust.


I used Sticky Embossing Powder to adhere my Vintage Platinum Glitter Dust, and then rubbed some off again in places so that the trees would have a slightly more distressed "bark" look.  Yeah, right... whoever heard of glittering bark?!


I used a pastel pencil, blended with a water brush, to create some shading under the trees to ground them.


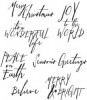
And I stamped the word from the Handwritten Holidays #1 set in Versamark before embossing with dark brown embossing powder.


The whole thing is mounted on some white card, both layers distressed with the Paper Distresser.  And I topped it off with some simple Crinkle Ribbon (slightly grunged with a hint of Ground Espresso) and fine twine.


It was a bit of a nightmare trying to photograph my sparkling trees, hanging the tag in the ivy in strong wind, trying to catch the last rays of the afternoon sun.  But I hope you think it was worth it.


Thanks so much for stopping by today, and I'll see you again soon.

Alison x

Thursday, 10 December 2015

Peace On Earth

Hello Everyone! Jennie here today with the first of my projects for this month.

I am sharing a 3" x 6" Christmas card (I think this might become my favourite size!) using some of Tim Holtz's latest products and techniques and some old favourites too.


I started with a piece of white cardstock and used Tim's technique for his November tag. You can get all the details here. Whilst I used Picket Fence Distress Paint to create the resist I used Old Paper Distress Ink using the Wrinkle Free Technique rather than the Distress Sprays he uses.  I absolutely love this technique and stamp and you may get a little fed up with seeing it !!!!


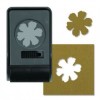
Whilst this was drying I used the Tattered Florals Punch to create my base petals and sprayed them all with Dylusions Postbox Red Ink Spray. 


They got the usual scrunched up treatment and then I made the  roses. Click the link HERE if you want to see the tutorial on my blog for making these vintage style roses.


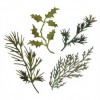
Holly leaves were next: I cut one set from the Holiday Greens die and sprayed them with Peeled Paint Distress Spray Stain. I love the way the paint dries in such a mottled way. 


Then it was time to put it all together:  matting my linen style backing sheet onto some dark green cardstock and creating a little cluster of the flowers and leaves with some scrim and pearl trim.


Finally I added a sentiment and some pearls.

This really is a cute little card and the Tattered Florals Punch creates a smaller flower which fits these smaller scale projects perfectly. 

Thank you for joining me today and whatever you are doing I hope you are managing a little crafting as well.

Jennie x