Thursday, 24 March 2016

Wildflower and Crazy Cat birthday

Hi everyone. Today I am sharing this birthday card I made using the fabulous wildflower dies, one of Tim Holtz's releases this year.
I started by taking the latticework stencil and applying some versamark with cut and dry foam. I then sprayed with distress sprays - (scattered straw and bundled sage) and a little water.
I allowed this to dry and then cut an oval from the middle and also pencilled the same size oval another piece of card.
I added some distress ink to the card covering the area of the oval and splashed a little water on it.
Once dry I stamped my crazy cat - half way across the oval - and coloured using rusty hinge distress ink.
I die cut some wildflowers and coloured with distress inks.
I added some vintage photo to the edge of my top layer and round the oval aperture.
See you next time.
Nikki


Tuesday, 22 March 2016

Doily Love


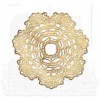
Hello Everyone, Jennie here with you today, sharing a card showcasing one of the wonderful new Tim Holtz Doily Dies. I was over the moon to see these appearing at CHA back in January and couldn't wait to get mine! So here is a quick project to give it a first outing!


I used cream medium weight cardstock which the die cut perfectly ..... and I didn't need to use any wax paper either. I blended a little Antique Linen Distress Ink around the edges.


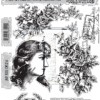
To give a little definition I cut  2.5" circle of cream cardstock and again using Antique Linen stamped the edges of the lovely small rose stamp from the Lady Rose stamp set. A little more Antique Linen was blended around the edges. I stuck this down with 3d foam.


For my background I used one of the 6x6 pieces from the new Dapper paper stack and layered this on to some cream cardstock and then onto my card base, sticking a little piece of ribbon across the middle before glueing everything down.


There was a little patterned cardstock left which was just enough to punch out four leaves to go with the tattered florals flower (tutorial on the sidebar of my blog if you would like to have a go).


And then it was just a matter of layering everything on to the doily and sticking it on to the background.  I added a simple sayings sentiment to complete the card.

This card really came together very quickly especially with pre-made flowers sitting in a box just waiting to be used. And the design lends itself to the sentiment being added at the last minute depending on what time of card you need.


The doily really makes this a very special card. 

I've cut out lots more so I am sure you will be seeing more of this lovely doily in future projects!

Thank you for joining me today.

Jennie x


Wednesday, 16 March 2016

Choose Happy

Hello! I was recently very honoured to be asked to be a wingman for Emma Godfrey and her new stamp release. That meant I was given the chance to play with her new stamps and create some samples! It didn't really take much thinking about as I jumped at the opportunity!
This is the stamp set I'm using today:
It is the first of the three new stamp sets and has some beautiful flowers and for some reason my brain turned them into animals (a bird and a fish!) which you can see here. I also reimagined them as a sheep and in the course of making the sheep I could see a bee and so I thought I'd share how to turn a flower into a sheep! I love that stamp sets don't have to be just as the designer imagined - that you can cut up sentiments to make new ones or, in this case, turn a flower head into something quite different. You feel like you're getting more for your money then don't you?!
To start, stamp out the large flower three times on to white card (I normally use cream card but you'll need white for this project!):
Then carefully cut out the centre and ink it with black ink:
Then, using the 'petals' from the flower, add rows to the black circle. Leave one quarter clear:
Cut out an ATC and then ink it with blue ink. I added a stencilled grass border. The legs for the sheep were the dot and dash stamp from the stamp set:
The bee was made the same way using the smaller flower as my base. The bee and flower were coloured with Distress Markers. The bee is coloured with Wild Honey and Black Soot Distress markers and the wings were two of the large flower petals, cut out and adhered at angles to each other - they have Glossy Accents on them for a little shine but I'm not sure the picture shows this! To add the sentiment I masked off a larger sentiment from the set, inked the stamp and then peeled off the tape before stamping:
Thank you, as always, for popping by - what other animals can you see from these stamps - I'd love to see them!