Saturday, 18 June 2016

Home sweet Home card

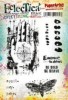
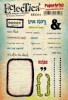
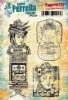
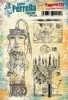
 Well Trace here again , and for this make I have used the same set of PaperArtsy stamps, as I used in this make here ...but this time I have used them to create a card, using some yummy distress goodies to create layers of interest on this simple card ...


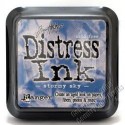
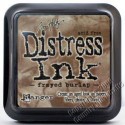
I started by smooshing some distress inks ...stormy sky and frayed burlap into my craft sheet and spritzing with water...I then spritzed a piece of card and swiped it through the inky dots..


I re-swiped until I was happy and then heat dried..

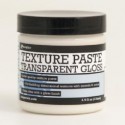
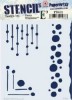
I then applied some texture paste, transparent gloss through a stencil, this one is a Tim Holtz one..


I applied in various places and left to dry


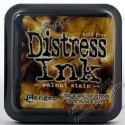
when dry I replaced the same stencil in different places on the background and added some walnut stain distress ink using a blending tool and added some more blue ink to deepen the colour.

I added to card front and inked edges using walnut stain distress ink.


For the main image , I stamped in walnut stain distress ink, which allowed me to take a wet brush and gently move some of the ink to soften the main image slightly...giving a very subltle watercolour effect.


I layered this piece onto some Tim Holtz pieces and a strip of the leftover background...adding a mini plaque and the word home stamped from same set..


Finally tying some dyed seam binding  around inside and forming a bow on the front of the card ...to add a little softness..


so hope you like this card ...using simple layers 


see you soon ..
keep those fingers inky!

trace x


Thursday, 16 June 2016

Rainbow star plaques

Today I am revisiting a project I did last year - creating my star plaques - I make quite a few of these for our pop up craft shop and the occasionally craft fair. This time I thought I would do a bright version. (You can see the original version here).
I took 2 plaques (6x3") and randomly added distress paints. I start with a brush but end up applying with my finger!
Once dry I wanted to crackle them - so added some Deco Art Weathered wood. A thin layer - using a credit card.
Normally at this stage - once dry - you quickly add the top layer of paint. Not quite sure what went wrong this time but when I added my top layer the crackles were not forming as I wished so wiped most of it away - resulting in two differing results. I quite like them - you can still the crackles - one very subtle - the other more like peeling paint.
My stars are created with greyboard - as thick as the bigz die will take! Again I created random colours on the board - using distress paints - but this time with a little marbling and drying between colours.
 Once dry I cut my stars using the Big Shot.
My words this time were computer generated, but I often use chit chat stickers. I also added some glitter to one of the plaques this time.
 I glue them on and then add glossy accents. When dry I adhere to the plaque with glossy accents. I add stickles around the edges.
The seam binding was coloured with distress stains.
Nikki


Tuesday, 14 June 2016

June

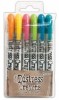
For my calendar page this month I chose to play with Distress Crayons and stencils. There's something really satisfying about crayons - is it because it reminds us of being a child?! Anyway the joy of using crayons still persists!
I started by scraping some blue paint on the page. I used an old gift card (and then a brayer for the later layers) but you can use whatever you prefer.
Then I added a layer of white
And then a layer of green
I kept adding layers until I was happy with the finished result (remember to dry layers in between otherwise you can damage the paper beneath)
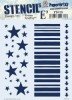
Now for the really fun bit! I placed my stencil on the page and drew inside with the distress crayon. Then, with the stencil in place, I rubbed the crayon with my finger so it blended and took on the form of the stencil. You get a thicker line at the edge in places which adds a natural highlight so I kept those bits in! I did falling drops at the top of the page and green stripes at the bottom.
I needed a little added interest to the background so I added some stamping in coordinating Distress Inks
All that was left was to add some white highlights to the Distress Marker stencilled marks, the sentiment and the main image. The main image was stamped on to an off cut from a tag (I really like the creamy colour - I normally cover that up with layers of paint!) Using the edge of my gift card I added some gold and dark grey lines.
Thank you, as always, for popping by