Wednesday, 20 July 2016

Voyage

Hello Everyone, Jennie here today, and thank you for joining me for my second post this month.


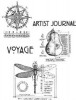
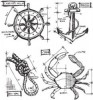
My husband has his birthday while we are sailing our yacht around the West Coast of Scotland so I decided to make sea faring card for him using as many of my nautical stamps and dies!


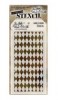
I started with Faded Jeans Distress Ink and my favourite Harlequinn layering stencil to add some colour to the base card.


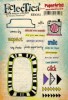
Then added some stamping.


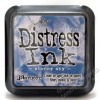
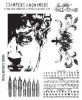
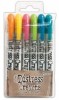
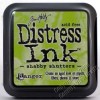
Vintage Photo Distress Ink was blended around the edges and I decided to add the pens to create a dominant feature in the bottom left hand corner.


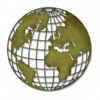
I cut my globe die in white cardstock and then (carefully!) added Vintage Photo Distress Ink and spritzed it to give a vintage look before overstamping with a text stamp in the same ink.


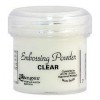
The blueprint anchor always cuts out very well. After blending Vintage Photo  around the edges and spritzing with some water I used clear embossing powder to give it a bit of a shine!


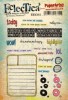
All my elements were then layered onto the inked and stamped base card and the two quotes added.


A suitable nautical card for my husband!

Thank you for joining me today.

Jennie x


Thursday, 14 July 2016

Crazy Cat Canvas

It's been a while since I posted a Crazy Cat project! I have made quite a few of these little canvases for the craft shop I am part of  - so thought I would share a couple with you today. Sorry I don't have any process photos for this one but here are the steps:
  • I start with 4 inch square canvases (10cm sq) and give them a coat of gesso followed by whatever my base colour is going to be. I mostly use PaperArtsy Chalk paints for this.
  • Once dry I add some stencilling or stamping in the background. In the one above I used Tim Holtz layering stencils - bubble, stars and schoolhouse. I take a little cut and dry foam and add just a little paint to use through the stencil. Archival ink works perfectly too.
  • I take my chosen crazy cat and emboss with clear embossing powder / versamark on white card. I then take whatever ink I am colouring the cat with and ink the whole cat - no need to do this perfectly as I then die cut the image.
  • I stamp and cut the eyes of the cat again and colour with different colour ink.
  • My words are computer generated - printed, add a little ink as required and some black pen and cut them out.
  • I then glue both the cat and words to the canvas and seal with matt medium.
Here are a few more examples!


Nikki


Tuesday, 12 July 2016

Pink Hair!

My daughter has had quite a month! She had her GCSEs, turned 16, got a part time job and left school (she's returning in September for A Levels so it's only a brief leaving!) and to celebrate she asked for pink hair - how could we refuse! I don't normally share any pages I make with photos but this occasion deserves remembering!
I started by painting a page with pink and white paint. It doesn't need to be an even coverage as this adds interest to the background.
Then I brayered on some blue paint. Then I brayered layers of pink, blue and white paint until I was happy.
Then I added some yellow letters
Then I added some stamped elements and some more stencilled elements (I rubbed a Distress Crayon through a stencil)
Then I stamped out a few elements on card and wrote a journalling card so I could remember this moment.
Thank you, as always, for popping by!

Friday, 8 July 2016

Infusions and a stencil.

Hi Brenda here. I love reverse mono printing with stencils so I thought I would experiment with some of the infusions and a stencil.


I used Daler Rowney mixed media paper and a stencil from Country View Crafts.
Place the stencil on the paper and spritz over it with a water mister.


Take the infusions and sprinkle them over the stencil and spritz again with water. (Next time I might try spritzing with tattered angels sprays).


Remove the stencil and place the wet side down on the paper beside the print you'd already made. 


Rub over the back with dry paper towel and lift to reveal the reverse print.


Take a clean piece of paper, spritz with water and lay the wet side of the stencil down again and rub and you will get another lighter print ......


..... repeat to see if you can get another one.


This is what I got. It may be I can use some of these for card making.


At the end of my experiments I had used several pieces of paper and cut out eight backgrounds to make cards. I inked the edges with shabby shutters, broken china and ground espresso distress inks.


I then took Tim's butterfly duo die and cut butterflies and embossed them. I painted them with water and some diarylide yellow media acrylic and when dry added watery abandoned coral distress ink and dried again then rubbed dried marigold and ground espresso distress ink pads over the top. I stamped the sentiment from Tim's perspective set, inked the edges with shabby shutters, broken china and ground espresso distress inks and coloured the word with a broken china distress marker.


Just before I took the photos I pinned a small key onto the bow with a small yellow pin I had in the drawer. This is one finished, I also have most of the elements to now make up the other seven for my box.


Thanks for stopping by and I hope you like these artsy background and if you try this technique do let me know, I would love to see what you make.

Have a great weekend.

hugs Brenda xxx