Lots of people like to start making cards early and hopefully this will give you a simple idea for making a batch of cards... they can then be made individual by adding simple touches to make them individual, such as altering layers, glitter or various embellishments.
I started by spritzing some tumbled glass distress spray stain onto a craft sheet, followed by some perfect pearls spray ( you can make your own by adding some perfect pearls powder into a mini mister and adding water..to create the effect of a perfect pearls spray - you can add a small bead into the mister to help mix up the powder, by shaking before spritzing).
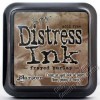
Add the piece of coloured card to the front of the card and trim , then ink around the edges using frayed burlap distress ink.
Now ink up small cluster of snowflakes stamps using white pigment ink and stamp randomly over the surface of the card.
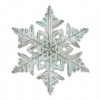
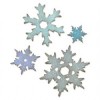
Using some of the card that has been coloured cut some snowflakes using layered snowflake, stacked snowflakes and movers and shakers snowflake dies. Edge all these die cut pieces using frayed burlap and have fun layering up onto the card.
Finally add an embellishment to the centre, I chose one of the idea-ology gumdrops and for another a tiny wooden star from stash.
Card 1 :
For this large snowflake , I spritzed the large snowflake with tumbled glass distress spray stain ...and added a gumdrop to the centre of the snowflake..
Card 2 :
For the centre of this I added a small wooden star...
Finally add an embellishment to the centre, I chose one of the idea-ology gumdrops and for another a tiny wooden star from stash.
Card 1 :
For this large snowflake , I spritzed the large snowflake with tumbled glass distress spray stain ...and added a gumdrop to the centre of the snowflake..
Here you can really see the sparkle that the perfect pearls adds .
Here you can see the white stamped snowflakes, as they don't show up in some of the other photos..
Card 2 :
For the centre of this I added a small wooden star...
Card 3 :
For this last card I added an embossed panel behind the snowflake....hopefully these three cards show how easy it is to make simple changes to cards to make them seem individual but also based on the same background and same ingredients.
I hope that this trio of cards have inspired you to have a go and have some snowy fun!
keep those fingers inky!
trace x


Icy gorgeousness Trace - what a great way to begin Christmas card preparations. xxx
ReplyDeleteThese are gorgeous Trace - so wonderfully shabby vintage x
ReplyDeleteoooo Trace - I lurveeee these - thanks for the inspiration young lady! Hugs rachel x
ReplyDeleteBeautifully created Trace!
ReplyDeleteSandy xx
Beautiful cards Trace, love the variations you've added and how they make each one so unique. Thanks for sharing them! Deb xo
ReplyDeleteWhat a lovely background you created for your beautiful snowflakes Trace! Julia xx
ReplyDeleteGorgeous Trace. Love the subtlety of these beauties x
ReplyDeletebeautiful Trace!!
ReplyDeleteAbsolutely beautiful, Trace!
ReplyDeleteAlison xx
Love your beautiful Christmas cards Trace, especially the one with the embossed background, could you possibly tell me the name of the embossing folder you used please.
ReplyDelete