
I love red and green but am so relunctant to put them together outside of Christmas but today I decided to do just that - stamping, die cutting and getting all inky to make this card…

Whilst I love all my Dylusions ink sprays I also have a box of standard Ranger ink washes too so they are the ones that came out to play. (You can use whatever ones you have.) I used Tim’s wrinkle free distress technique to create the base of the tag:
 |  |
A leaf silhouette stamp (any) stamped around the outside of the tag with black archival ink forms the top and bottom with second generation (shadow) stamping on the sides to create the outer frame. Once dry, a few splats of plain water all over the tag and then rolled with kitchen roll to remove the base green ink where the splats fell to give that bleached out droplets look:
 |  |
Using a white chalk ink pen I drew around the first generation stamped leaves only and then edged the whole tag with black DI:
 |  |
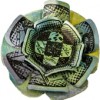
Now to the flowers: I love my Bloom impressions tool and use it frequently to shape my flowers. This petal layer has been cut using PaperArtsy Grunge flower die (from the combined #2 and #3 set). The (thin) card has been sprayed (drenched) with water using a mister and then shaped using the tool:
 |  |
The process is repeated using the larger die in the set:
 |  |
The larger the petals the more shape you can develop:

I cut out some leaves using a leaf die (this is a Tattered Lace die but any will do.) The white pen has been used to draw feature details on the leaves again:
 |  |
The leaves have been stuck down around the centre of the tag, ready for the flower to sit on the top:

When the petal layers have dried completely they can be glued together. You can edge them with DI, draw on them, glitter them, whatever you like. I decided to leave mine plain but I did roll a spiral of black card to add to the centre:
 |  |
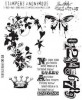
An 8” x 8” white card blank with black card for the mat and red card for the main background. I chose this set of stamps – Fairytale Frenzy CMS058:
 |  |
I stamped with black DI and then used it for the edges too:
 |  |
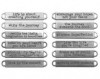
I found a spare black card corner in my b&b (bits and bobs) box to add top left. (It’s actually cut with a Spellbinders die.) I wrapped some red twine and a word band around the tag before gluing it down to the background and then attaching it all to the card:
 |  |
Tag and flower features:
 |  |
Completed:

This card would look good in almost any colour scheme and with any sentiment you care to give it.
Thanks for stopping by to take a look.
Enjoy your week!
Chris xxx


Great card Chris, - love how you did the background and the flower is so clever and looks very pretty!
ReplyDeleteFabulous techniques, love the richness of the shades you have chosen. Liking the doodling on the leaves & your flower is so lovely. A fab card:-) xxx
ReplyDeleteChris, I love your card. Isn't it funny how we crafters avoid using red and green together except for Christmas - Mother Nature doesn't bother about that, there are red and green together everywhere - your card reflects that. Love it! Jean.x
ReplyDeleteThe colours are very striking Chris and I LOVE the gorgeous flower - I keep telling myself that I don't 'need' that flower tool but I am ever so tempted..... you are such an enabler! Anne x
ReplyDeleteFabulous card Chris - the colours are wonderful and the flower is gorgeous. I have the tool but haven;t really used it yet. So I shall now put it out on the desk to use! Jennie x
ReplyDeleteWhat a terrific card and such a great tutorial... looks like a clever little gadget!
ReplyDeleteAlison x
This is stunning Chris. Amazing background details but the flower has really caught my eye.
ReplyDeleteTFS and hugs Annie x