
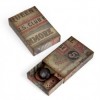
Well Trace here and for today's make I have been playing with Tim Holtz's matchbox die...it is a firm favourite of mine and this time I went all soft and gentle! So here is the finished piece and all the details will follow..

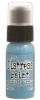
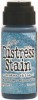
I started by cutting the matchbox die from cardstock. Then for adding colour...I applied some distress stain in blues to my craft sheet, spritzed the die cut and swiped through the stain. Dried and then re dipped into the stain and dried again.

Here is the matchbox die cut coloured with stains, then I applied some stormy sky distress ink using a mini blending tool ( these are great for small pieces ) .

Now to create some more detail, spritz some water into the palm of your hand and flick across the inked surface, leave for a few seconds and heat dry (large spots can be blotted off ).

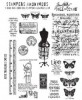
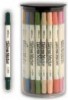
Now for the butterflies , I wanted a blue/green palette so tested some distress markers onto a piece of card in various shades. I stamped the butterflies in jet black archival and heat set before colouring. I used two sets of these butterflies and also some of Tim's smaller butterflies (stamps listed below . )

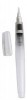
For the colouring of these I applied colour to the butterflies and then washed over with my waterbrush, to blend and soften the colours .

For the inside of the box I wanted a piece to fit inside perfectly , so I die cut another base piece and then trimmed out the middle . I stamped the butterflies onto it and added colour. I edged with stormy sky Distress ink.

Now for the embellishments of the box..
I used one of the new metal pieces and painted using distress paint, allowing each colour to dry before applying the next.

Here is the completed piece, against the original metal colour.

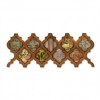
So here is the completed piece....
I added a piece of the framework die inked in blue to the front of the box, the metal embellishment and some of the smaller coloured butterflies...just glued in the centre. I dyed some seam binding using tumbled glass and when dry tied around the lid of the box. finally adding the word fly using a rub on.
Here is the inside of the little box as well, with the coloured butterflies glued into place. I then cut another set of butterflies and added , gluing only in the middle so that the wings stick up.

I added some little spools painted with tumbled glass distress paint.

I continued the small cut out butterflies around the side of the box .
Below is a close up of the inside...I also edged the box with very light use of walnut stain x

Well hope you like my make and all supplies are listed below...


keep those fingers inky!
Trace x
Gorgeous work Trace, Love the colours & fabulous butterflies.. great embellishments...Beautiful piece... Hugs may x x
ReplyDeleteLovely piece Trace!
ReplyDeleteSally
Trace I absolutely love this little matchbox. I did not realise until I read through that the flowers were a painted metal embellishment, this looks great and those butterflies.... just stunning. Mo x
ReplyDeleteWhat a fabulous make Trace, love the soft colours, the beautiful butterflies and those metal flowers are just the perfect finishing touch! Both the in- and the outside look fantastic and what a great step by step! Thanks for the inspiration!!
ReplyDeleteAbsolutely lovely - the altered metal looks fantastic, and I love the gentle summer blues.
ReplyDeleteAlison xx
Your matchbox is beautiful Trace. Love the blue tones and gorgeous butterflies.
ReplyDeleteTFS Annie x
Beautiful! Love the colours of the matchbox and the ink on the metal works great! Hugs, Gerrina
ReplyDeleteSo, so beautiful Trace! It is amazing how much you can pack into a matchbox, I love it. Anne xx
ReplyDeletestunning work Trace - love thos metal flowers - they look worth investigating! Great piece - hugs Rachel x
ReplyDeleteSorry didn't add link , they are natures adornments xx :)
DeleteSensational box, love all the colours and embellishments, so beautiful :-) xxx
ReplyDeleteAbsolutely fabulous!!! Wow!!!!
ReplyDeleteSandy xx