

For the smaller ones I took cardstock measuring 6 1/4 inches by 4 inches (but you can vary this as you will see from the larger one.)
I scored at 1,3,4,6 inches on the long side and 1 inch on the short side. Cut away the extra bits as shown below.
I also turn the card and score part the way down (dotted line) on what will become the creased side of the bag. You can do this when you construct your bag instead.

For the example here I have used plain card which I have then decorated. I added some distress ink to the edges that would show.

As this size bag is 2 inches wide you need something just under that to form the flap over the top that closes the bag. On this example I have used 1 1/2 inch circle framelit with a scallop in the centre for decoration. You also use a small tag or a die cut frame.
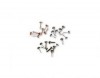
The closing flap is glued firmly to one side of the bag, folded over the top and then held together using twine tied around brads... this is best explained in the photos.


On this example I decorated with a crackled star and some chit chat stickers.


My valentine bag has been made in a similar way but decorated using Tim Holtz hearts stencil and some Ideology ephemera. I used a hitch fastener on this one.
The larger bag is made from the Tim Holtz wallflower paper so was pretty quick. I increased the size to 5 1/2 x 7 1/2 inches and scored at 1 1/2, 3 1/2, 5 and 7 inches on the long side and 1 1/2 on the short side. I used the flower from tattered florals to create my flap and also to make the flower embellishment.

When I make something like this for the first time I play around with a piece of photocopy paper first to make sure I have the right dimensions and know how to construct it.
I hope you like the little bags. If you have any questions please do hop over to my blog and leave me a message.
Nikki x


Oh,I thought you used a die as they looked that good!! I've saved this page and will have a go at making them.
ReplyDeleteThanks Nikki,you're a star ;)
Big hugs
Donna xxx
Fabulous project Nikki, and these will make wonderful gifts all by themselves! Thanks for sharing! hugs :)
ReplyDeleteFantastic inspiration Nikki, they look easy to make thanks to your tutorial :-) xxx
ReplyDeleteLovely bags. I've bookmarked this page. This will be my next project. Thanks for the inspiration xxx
ReplyDeleteWonderful Nikki, all of your treat bags are lovely!
ReplyDelete