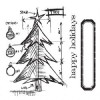
Today I have a Christmas card made with Tim Holtz Tree blueprint and framelits. So sorry I have no step by step photos of this one. I started with white card and used distress inks in blueprint sketch and stormy sky to add some colour before spritzing and flicking on some water. Once dry I added some vintage photo around the edges. I then stamped the Christmas tree from the stamp set.
I stamped the image 3 x on another piece of card and used the framelits to cut the three layers before inking with various greeny / yellow tones (shabby shutters, pine needles and mustard seed).
I edged all the layers in vintage photo again before building up my layers using foam pads.
I added a little colour with my water brush to my baubles and star before stamping, die cutting and colouring the greeting.
Thanks for stopping by - see you in December!
Nikki Acton




Cool make
ReplyDeleteKathyk
Fabulous, layering the tree adds so much dimension! Love how you have coloured it too. The background is lovely and the tree itself really seems to glow!
ReplyDeleteSo sweet - the dimensional layering is fab!
ReplyDeleteAlison xx
Love your layered tree Nikki, thanks for sharing it! Deb xo
ReplyDeletegreat layering Nikki - this is fantastic xx
ReplyDeleteBeautiful grungy Christmas cards! I love those layers and your choice of colors! Your inking is fantastic and so inspiring! Hugs!
ReplyDeleteBeautiful grungy Christmas cards! I love those layers and your choice of colors! Your inking is fantastic and so inspiring! Hugs!
ReplyDelete