
Are you like me and have loads of die cuts lying around the desk - cut for one project or another, but not used? Well here is a great way of using them.

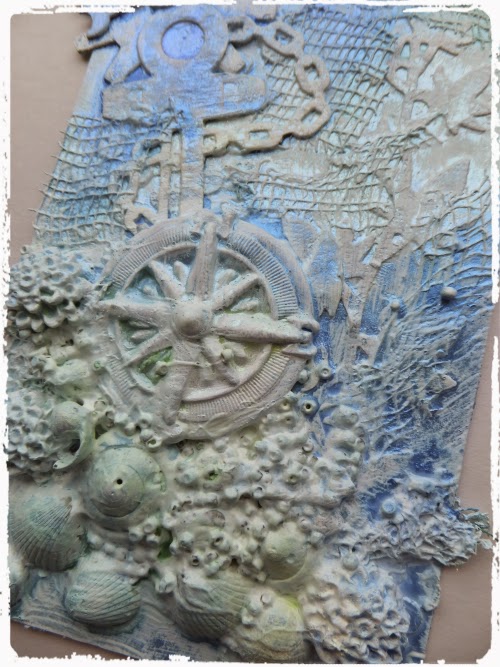
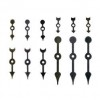
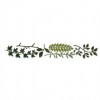
I have taken a Ranger No #8 tag and first added a few dots here and there with a circle mask and Grunge Paste - use any mask or stencil, just get some texture on the tag. I then gathered some die cuts which had a "seaside" feel to them. - Tim Holtz Cogs and Spring Greenery and a Marianne Design Anchor. You can see they are all different colours, but just stick them down! I added some scrim over the top - you could use builders mesh or some netting or light muslin. I love working with paper clay and moulds but sometimes the pieces just don't feel right on a page or tag, so this compass had been lying around for a bit and so had these little flowers. I have even put a metal spinner on the cog as this will take the next stage well too. I filled in the gaps with some shells - some found on the beach here in Shetland and others bought. Finally I filled in the smaller gaps with seed beads.
At this stage leave it to dry overnight - if you attempt the next stage before everything has really stuck down you will probably have problems!

And this is the bit I LOVE! Cover the whole lot with white gesso - some areas will need a couple of coats - and use a small paintbrush so you can get into all the nooks and crannies. You will find it SO therapeutic and it looks fabulous when finished. The gesso evens everything out giving you a blank canvas to work with. Notice how even the metal gets covered too.
Again leave to dry fully (this is a great project for fitting in around another project!).

Then hunt around in your stash for some lovely spray colours which will fit your theme. I have used sprays made from Lumine Arte Primary Elements as I had them already made from another project, but I also love Tattered Angels Glimmer Mists and you can get absolutely fabulous effects from mixing Distress Ink Re-inkers with Perfect Pearls. For a darker effect try Dylusions Ink Sprays - you can always tone them down a bit by spraying them with a little water if you want something lighter.

Dab off the inks here and there so you get different levels of colour and let the gesso show through in places. Again this needs some good drying time. You can blitz it with the heat gun, but bear in mind what you have stuck down - my paper clay compass started to soften and buckle when I got impatient and tried to speed up the drying time!

And that is all there is to it.
I love this technique for trying out different types of textures and colours. I love it too as I can use up lots of bits and pieces lying around the desk from other projects. It works fabulously with flowers made for projects and not used. And … I find it makes a fabulous topper for a birthday card for someone special as you can choose die cuts or pieces which you know they are going to love.
I hope this has given you some inspiration and I do hope you will give it a try.
Jennie

This is a fabulous technique Jennie thanks so much for showing it. I'm in my seat on the plane as I read this. .Off to sunny Rhodes for a week! Xx
ReplyDeleteFabulous Jennie! Nikki xx
ReplyDeleteThis is such a great technique and the final result looks amazing!!
ReplyDeleteThis is brilliant Jennie, I have a desk full of stuff that could receive this treatment! xx
ReplyDeleteWhat a gorgeous piece of art Jennie. Thank you for such great tutorial. Hugs Rita xxx
ReplyDeleteBeautiful! Great tutorial too Jennie. A x
ReplyDeleteThank you Jennie for a great tutorial ,I love the gesso stage , even without the spray colours!
ReplyDeleteXxRuth
Very cool. Thanks so much for the step by step - very helpful!
ReplyDeleteFabulous ideas here Jennie. Must do this... Jenny x
ReplyDelete