
Hi Everyone, Jennie here and today I am sharing with you a bit of an experiment, but I think you will like it! I wasn't too sure where this was going but it turned out ok!

Some of you will know that I love to take a few Distress Inks at random and see what happens, so today's pick was:
Mustard Seed (not my favourite but hey ho this is an experiment!)
Mowed Lawn (not had an outing in a while and a new one for me anyway)
Seedless Preserves (always right there in your face colour)

And now for the technique: Tim Holtz Monoprinting with Distress Inks (p48 of the Compendium of Curiosities Volume III)

I applied the three colours randomly straight from the pad onto my Layering Stencil, misted with water and then pressed the stencil onto my tag to transfer the ink colours. Remove the stencil very carefully so as not to smudge the pattern. I was very pleased with the effect and thought the colour combination looked great.

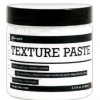
However I did feel it looked a bit flat, so (once it had dried) I decided to reapply the stencil and taped it down with some tape to keep it in place and applied Tim Holtz Texture Paste with a palette knife. I am loving the Texture Paste - it is like a fondant mousse to work with, very light and goes on to the paper very easily with a palette knife.
(No prizes for noticing that I work with my stencils back to front ………)

The effect is fabulous! it really is 3d, in fact if you look at it too long it makes you feel a little giddy!
So that was my experiment but I took it another step further by making some flowers with the Mustard Seed and Seedless Preserves Distress Inks.

Tattered Florals Die Cuts were inked first with the Mustard Seed and then the edges with Seedless Preserves. You can see that I am not particularly careful, it is just about getting the ink on the paper.

Once spritzed with water and scrumpled up around a paintbrush the colours blended beautifully and were beginning to look very autumnal! You can tell I was crafting at night at this point!

I would normally leave them to dry overnight, but I desperately wanted to peep at the colour, so I blitzed them for a while with the heat gun and then carefully opened them out. You can see that they were still quite damp and I got a few tears.

I gave them another blitz with the heat gun and haphazardly curled the edges. Don't the colours look fabulous! (I am really loving this choice and may feel quite differently about Mustard Seed in future!)

Next was some ribbon which looked better in the Mustard Seed and Seedless Preserves. My first attempt including the Mowed Lawn looked a bit like the inside of the lawnmower box !
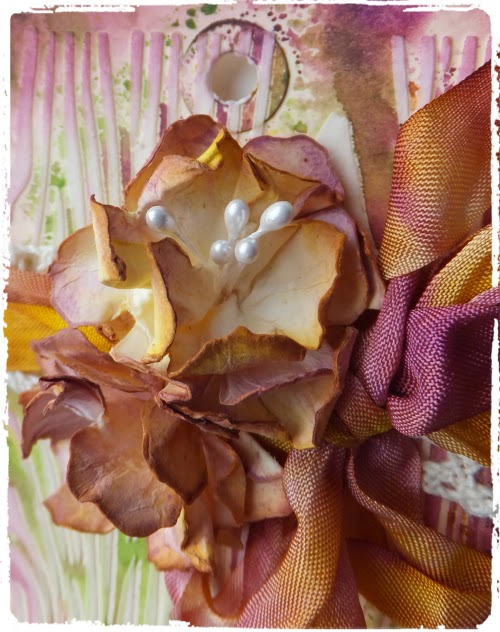
And then it was time to put it all together. I added some lace to the tag and tied the ribbon over the top with a bow to the side.
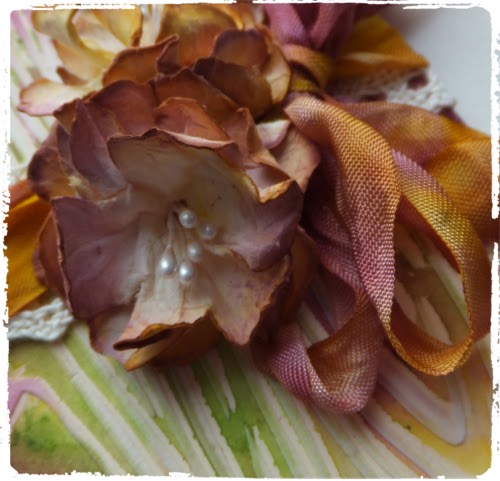
I added some stamens to the flowers and glued them on top of the ribbon. I really didn't want to cover up the lovely background, so I just added a sentiment to the bottom of the tag from the Simple Sayings Stamp Set.

I really like this combination of colours and would certainly use them again. And I can't wait to try the technique with another Layering Stencil.
Thank you for joining me today.
Jennie x


Very cool. I have bee wanting to try out the texture paste. It looks like a lot of fun to work with.
ReplyDeletePutting the texture paste back through the stencil that way has made such an impact on that background! Love this idea Jennie and as ever your floral bouquet is a joy. Jenny x
ReplyDeleteFantastic experiment Jennie, wow, what a colour combination, but yes, it totally works. The background looks fantastic and the flowers despite the speed drying are stunning too! Great step by step as well!
ReplyDeleteLove everything about this" experiment" Jennie!
ReplyDeleteI will be having a go with a new stencil I have .
As always gorgeous flowers!
XxRuth
Stunning work Jennie I too love that texture paste and use it quite a lot - love the colours you have chosen
ReplyDeleteStunning Tag Jenny. The colours have definitely worked for you. Love the idea of the texture paste. As always your flowers are delightful. Enjoy your Evening. Hugs Rita xxx
ReplyDeleteSuch a beautiful tag, great tutorial and your flowers are lush. What kind of paper do you use for your flowers. My normal supply is getting low and I can't get it anymore.
ReplyDeleteJulie x
Fabulous experiment and such a beautiful result! Anne x
ReplyDeleteThis is such a color riot and a beautiful tag! The texture shows thru so well and flowers...I have no words. You are the best! Thanks Jennie for showing the procedure.
ReplyDeleteLooks amazing Jennie and I love the colours
ReplyDeleteTFS and best wishes
Annie x
Love the mix of colour and texture, must have a go at this. TFS. Xxx
ReplyDeleteI love this page and the colours. What paper do u use for your flowers?
ReplyDeleteFabulous and that mustard seed/seedless preserve combo is magic
ReplyDelete