You would think that using a scenic or purposed backing paper would be the easiest thing in the world when making a card, wouldn’t you? Not for me! I look at the scene and usually don’t want to cover it with anything at all. Finding a way to use the paper and maintain the integrity of the scene is something that I often struggle to do. I’m wondering whether anyone else out there has the same problem? If you do, this post is for you…

I started with a scallop-edged 8” x 8” card blank and cut 2 mats for the base. The backing paper has been cut from a 12” x 12” scrapbooking paper, whichever way it was cut it formed a scene all over. I’ve given it a light edging with Brushed corduroy DI:
 |  |
Mat and layered (but I don't want to cover any of it, lol!):

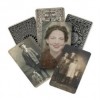
This photo’ from Tim’s ‘Found relatives’ set was ideal for this card. I distressed the edges with a scalpel and inked it with the DI. Next I set about collecting the other things I wanted to include as embellishments:
 |  |
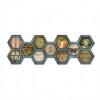
White lace has been laid over a blue patterned washii tape. To add interest and focus to the photo I added some greyboard cut with the Honeycomb Frameworks die painted with Ice blue Fresco:
 |  |
A few tags back, Tim used the debris from Frameworks dies as in-fills – that’s what I’ve done here to cover the left edge of the photo. This beautiful Spellbinders D-Lites anchor has been cut from matte gold card with actual tiny seashells stuck around it that Brenda brought back from the seaside for me:
 |  |
Spellbinders flourish dies have been cut from plain black card as a feature for the stamped message tag:
 |  |
These ‘birds’ are more debris from another die and the gulls in the bottom left corner are an epoxy sticker embellishment from an old scrapping collection:
 |  |
Left:

Right:

Top right, bottom right, bottom left and centre:
 |  |
 |  |
Complete:

Thanks for stopping by today, have a great week!
Chris xxx


