
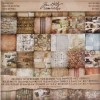
Hi, Amanda here again, and this time I have a scrapbook page to share with you. The photo I've used isn't great quality (the subjects are small, and it was taken on a grey and wet day), so I wanted a simple layout that wouldn't swamp the main picture. To achieve this I used stencilling, stamping and journalling directly onto the background and a limited colour pallette, with only a couple of dimensional elements. I chose a single background paper from Tim Holtz's "Destinations" stack, as it had the right feel for a damp January day and, with its five red stripes, picked out the red of my little boy's snowsuit, as well as suggesting both guitar strings and a musical stave. I hope you like it!

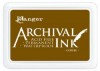
First, I stencilled a musical stave onto the corner of the page, using a That Special Touch border mask. I did this in three layers. The first layer covered the whole mask using coffee archival ink, applied using Cut n Dry foam. For some of the smaller apertures in the mask, such as around the numbers, I used a stiff paintbrush to stipple the ink on and improve the definition.

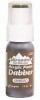
For the second layer, I highlighted several areas on the mask using an espresso paint dabber:

For the final layer, I highlighted just a few places with black archival ink, again applied using Cut n Dry foam:

To balance this on the page, I stamped a treble clef (an old Creative Stamping magazine freebie) in the opposite corner using coffee archival ink, then toned down the image by rubbing some of the same ink over it using Cut n Dry foam:

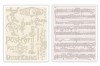
Next, I made a sheet of music by embossing grey marl card using a Tim Holtz sheet music embossing folder, then dragging the coffee archival ink pad over it to highlight the embossing. To make it look like it had been torn out of a music book, I punched the edge using a Bind-It-All, then tore the binding holes. I tore the bottom off the sheet, scrumpled the edges, and finished with some archival ink applied with Cut n Dry foam around the edges and a few random dabs with an espresso paint dabber:

I mounted the photo on coordinating paper from the Destinations stack and distressed the edges using a scratching tool:

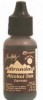
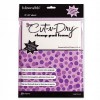
Once I'd stuck the music and photo onto the page, I added some musical notes to the photo and beyond. The notes started as gold peel-offs, but I changed their colour by dabbing over three coats of undiluted espresso alcohol ink:

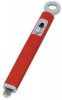
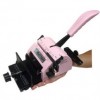
Next I used a guitar peel-off as a stencil to make a guitar embellishment. I gently stuck the peel-off to wood-effect paper and rubbed coffee archival ink over it using Cut n Dry foam:

Then I removed the peel-off and added some details with a brushmarker, then cut out the guitar and mounted it on card.

Finally, I stuck the guitar in place, and added a title and some journalling.

Thanks for visiting, and happy crafting!


Gorgeous LO, love the stencilling work!
ReplyDeleteGreat page with such great use of the musical motifs throughout.
ReplyDeleteAlison x