And now for all the details...
So I started by cutting this great shadowbox from card ( I used 300gsm to give it some weight but it cuts beautifully from normal weight card ). Now to get inky..and painty..
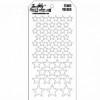
I applied some antique linen distress paint through the stars layering stencil in patches over the front, sides and back of the box, using a piece of cut and dry foam. Make sure you rinse this out and clean the stencil as when dry the paint is permanent.
Hopefully you can see how I have applied the paint through only some parts of the stencil and not over the whole piece.
As I wanted to add a piece inside at the back of the shadow box , I cut a piece to fit this and added antique linen distress paint through the stars stencil, to cover the whole piece this time .
When dry I then added pumice stone distress ink over the pieces...love how the painty stars pop through the distress ink.
As the inside of the box will be seen I applied some pumice stone distress ink through the same stars stencil, using mini blending tool. ( I didn't worry too much about the back piece as I know that this will be covered up).
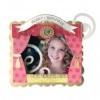
Here is the front complete with painty stars and inked. Now ready to be assembled.
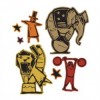
Now for the image inside , I used the new big top set that includes dies and co ordinating stamps. I firstly stamped the stamp in jet black archival and heat set. These are a doddle to cut , especially with the really cool magnetic platform! Follow instructions on the platform , but the great thing is no moving dies, no messy tape as the magnetic plate just holds the die in place ! Just line up the die around the stamped image...put through machine using cutting plates as instructed and ....voila!
Here is the image beautifully and neatly trimmed! I repeated this for the elephant too.
Now sorry but step x steps are a bit lacking as I got caught up in the creating...and well I forgot! :(
Here is the close up of the elephant, cut as above and then coloured using distress markers and water brush. I added some distress glitter on the stars and a star embellishment. To stand him on top of the constructed shadow box I glued a small vial behind him and glued this to the top of the shadow box.
I added the star panel inside the shadow box before constructing and then again coloured the lion image in the same way as the elephant. I added some pumice stone glitter around the edges of the shadow box. To make the lion stand proud of the back, I again glued to a small vial first and the added into the box. To complete the front I added a chit chat sticker.
I wanted to make some little feet for the box and so coloured a couple of spools with pumice stone distress paint and brushed pewter. I added a line of distress glitter at the top and bottom of the spools and added.
Well there will lots more inspiration coming your way soon, so make sure you keep popping back to see my fab team mates makes and I will be back later in the month.
keep those fingers inky!
Trace x








So clever and a brilliant make. Love the creativity in your 3D project and how you have used those great stamps xx
ReplyDeleteGreat work by Tracy, love it all! Love those stamps and the associated dies and what a clever way to show them off. Nikki xx
ReplyDeletethis is just so cool Trace - love it to pieces! Hugs rachel x
ReplyDeleteFantastic 3D project, the box frame looks amazing. The magnetic platform is great isn't it! :-) xxx
ReplyDeleteVery cool Trace!! love the whole piece...it's awesome!
ReplyDeleteWhat a great theme! Love the stars; they really fit into the theme. Beautiful project!
ReplyDeleteBeautiful Trace, love the theme, love the box, love the feet! I have the stamps and now wish I had the dies, cutting them is not so easy by hand... I know I have said it before, but it is lovely to have you back! Hugs, Anne xx
ReplyDeleteA fabulous shadow box!
ReplyDeleteI see exactly what you mean about this shadow box being a great design and you've used it to great advantage here with your mini circus. Love the addition of the glitter around the edges and the stencilled stars inside the box. Fabulous! Jenny x
ReplyDeleteLove your brilliant circus shadow box - what a fabulous use of those cool stamps and the detailing of the glitter and stencilling is brilliant as always.
ReplyDeleteAlison xx
A wonderful project Trace,- love your box frame, and the star background. Your tiny circus is so sweet with the elephant and the lion and exatly have the circus bling needed ,around the edges . Gorgeous. xo, Dorthe
ReplyDeleteWhat an absolute amazing way to showcase these cool die cuts. I love this project!! Fabulous job Trace!! -- Mary Elizabeth
ReplyDeleteAwesome Trace! Just got the Big Top set! Love what you did with it! :D
ReplyDelete