Well for today's make I have used some dominoes to create small book. These are great fun to make and decorate . So here she is :
And here is the inside pages when the little book is open.
Now for the how too:
I cut a piece of card 22 cm x 4.2 cm approx and creased ( approx every 2.1 cm so the the pages were formed and folded to from a concertina. Then unfolded and coloured using antique linen distress ink. ( dominoes vary in size so it may be best to check before following these sizes ).
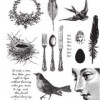
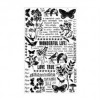
Now for the stamping...I wanted to layer up small images inside so stared stamping with my lightest colour antique linen... for the first page I folded book and stamped using a variety of images . I went for nature inspired images for this little book.
For the inside pages so that the images did not look messy and overlap too much I used a small piece of tissue tape to mask off the pages next to where I was stamping.
Here are the inside pages with the stamping completed in antique linen and frayed burlap.
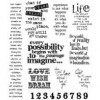
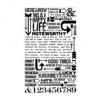
Now for the black words and images...I wanted to use just one word from this large stamps..so coloured that word using black soot distress marker and then stamped....This is a great way of using a specific part of a larger stamp.
Here are the inside pages now the black stamped detail has been added...I used archival ink for most of my black stamping and just ensure you heat dry so as not to smudge previous stamped areas..especially when masking some off.
This really shows how the layers come together.
Now for the dominoes.. I coloured the front flat surfaces suing alcohol inks on a blending tool with a piece of alcohol ink felt.
I continued to build up the colour by re applying a second layer.
I edged the dominoes with tissue tape and lined inside with card ( not necessary but it gave me a flat surface to glue ribbon on in next step ).
I added a length of linen ribbon to the inside of the domino that would form the front cover and also for the back cover.
Finally add the pages of your book to the inside of the domino covers .
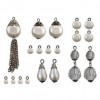
For the front cover I added some rub ons and a gorgeous idea-ology natures adornment that I added vintage photo distress glitter to the centres of the flowers.
To the linen ribbon that I tied to close the book I added some idea-ology and a chain tassel.
More rub ons for the back...
Hope that you have found this step x step useful and that maybe you will have a go at making a mini domino book yourself.
keep those fingers inky x
trace x








A beautiful little creation and such a fun project to make xx
ReplyDeleteIt really looks as if you enjoyed making this little treasure - beautiful indeed. Now I wonder what happened to that box of dominoes which are somewhere in my crafty stash!!!
ReplyDeleteGreat idea and lovely result x
ReplyDeleteTracy what a wonderful make!
ReplyDeleteTrace, this is gorgeous. Thanks for sharing. Jean.x
ReplyDeleteIt's completely enchanting, Trace... I've got dominoes sitting around and still haven't tried this. This is such lovely inspiration - perfect stamping, gorgeous inking and rub-ons on the covers, and beautifully finished with the linen ribbon.
ReplyDeleteAlison xx
This is brilliant Tracey, love your little accordion book!! Great stamping and a stunning cover!
ReplyDeletegreat tutorial Trace thanks - fabulous idea xx
ReplyDeleteFabulous domino book, i found my stash last week and am trying to make a domino brooch. Thank you for some wonderful inspiration:-) xxx
ReplyDeleteFantastic, such great stamping!
ReplyDeleteThis is a lovely creation Trace, I too have got dominos waiting to be altered but not had a try yet, you may just have given me the inspiration I need. Great tutorial. Mo x
ReplyDeleteThis is an absolute delight Trace, I love the stamping and covers are beautiful! It is ages since I made one of these and really want to do another now! Great tutorial too. Anne xx
ReplyDeleteSeriously Trace, this is a gem! LOVE the stamping detail, the use of the metal floral twig and the rub ons. You are one clever lady. Jenny x
ReplyDeleteBeautious! Wow so cool! I need dominoes!! Thanks for showing us how you layer your stamping!
ReplyDeleteThis is just gorgeous,thankyou for the tutorial,and,yes I'm going to have a go at making one! xx
ReplyDelete