
Today it’s a festive gift box decorated with poinsettias…

The box is simple to make and even simpler if you have a scoreboard of some description. You can make this as large or as small as you need it to be. (If you want to make a larger version then please check out the Big Score in the gallery list.)
 Start by scoring the lines in the card according to the size of box you want. So, if you want a 5” square box, you need to score 3 x 5” squares across by 3 x 5” squares down (9 squares). Crease the score lines.
 Now score a line to the left of all of the central outside squares which will form the flaps to form the box. Cut out the template with sides. Snip the top and bottom of the side panels to make the flaps and then crease them.
 Make the lid by following the same principles but the square has to be marginally bigger to fit over the box. (I usually allow at least 0.5cm per side.)
 I used green coloured card so that I didn’t have to colour the inside of the box, you can use whatever colours you’d like to.
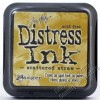
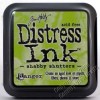
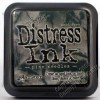
  I used Tim’s wrinkle-free distress technique to colour the other side using a coordinating colour DI pad.
 Each square has been decorated using a square of card embossed using an embossing folder then randomly distressed with Treasure Gold.
  The panels were mounted upon squares of gold mirri card and then stuck to the squares before forming the template into a box by gluing the flaps to the corresponding sides.
 Repeat the process for the lid and now the box is ready for decorating.
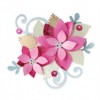
 The poinsettia and leaves I’ve used for my box is an old Spellbinders set but I’ve also put some other suggestions into the product gallery
  below as there are some other, beautiful alternatives that you might want to use. All the elements have been cut, coloured with DIs and each flower layer is a different colour.
 When all the pieces have been prepared, layer them together with a strong glue (Multi medium matte).

(You might want to add some Distress glitter, Stickles or Glossy accents to your flowers to enhance them.)
 Once the flowers have been attached to the panels you can decorate the panels for the lid with text if you’d like. I’m fortunate enough to have some sentiment dies but you could use rub-ons, stamps or peel-offs if you have them.
 Sides:
 Angled:
 Top:
Top:
Have fun making this as a fab box for under your tree!
Chris xxx


This is fabulous Chris thanks so much for sharing it. What a perfect box for Christmas xx
ReplyDeleteLovely box, very festive! X
ReplyDeleteFabulous box, beautifully made!
ReplyDeleteI love your box ;) Thanks for the tutorial :)
ReplyDelete